


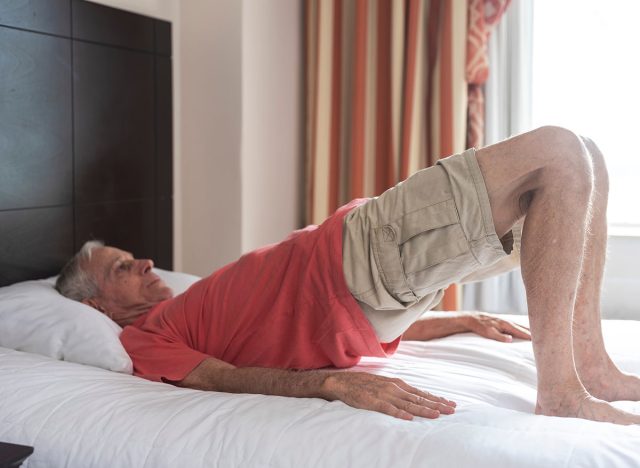
In the landscape of functional fitness, few movements are as deceptively simple—or as critically important—as the glute bridge. Often relegated to the warm-up portion of a workout, the glute bridge is actually a masterclass in biomechanics. It serves as a diagnostic tool for how your body manages load, stability, and force production. For individuals over the age of 60, the ability to hold a proper bridge for 90 seconds is not just a fitness milestone; it is a vital indicator of physical independence and long-term mobility.
As we age, the gluteal muscles—the largest and most powerful in the human body—are prone to "gluteal amnesia" or disuse atrophy. This isn’t merely an aesthetic concern; it is a functional crisis. When the glutes fail to fire effectively, the lower back, knees, and hips are forced to compensate, often leading to chronic pain and an increased risk of falls. By mastering the bridge hold, you are essentially "reprogramming" your posterior chain to handle the rigors of daily life.
The Biomechanics of the Bridge: A Foundation for Daily Life
The glute bridge is a fundamental movement pattern that mimics the primary way humans interact with their environment. Every time you stand up from a low armchair, climb a flight of stairs, or navigate an uneven sidewalk, you are performing a version of a hip extension.
The gluteus maximus is the prime mover in this action, but it relies on a sophisticated support system. The core muscles, specifically the deep stabilizers of the pelvis, must engage to ensure that the spine remains in a neutral, safe position. When you hold a bridge, you are training your body to integrate these systems. You are teaching your hips to drive the movement while your core prevents the pelvis from tilting or rotating. For those over 60, this integration is the difference between moving with confidence and moving with caution.
The Chronology of Strength: From Testing to Transformation
To understand the efficacy of the bridge, one must view it as a chronological process of building muscular endurance.
Phase 1: The Diagnostic Hold (The First 30 Seconds)
In the initial stage of a bridge hold, the body recruits "fast-twitch" muscle fibers to stabilize the position. If you find yourself struggling to maintain a neutral spine within the first 30 seconds, it is a clear indicator that your glutes are not firing in coordination with your deep core.
Phase 2: The Endurance Threshold (30 to 60 Seconds)
As you push past the 30-second mark, the body begins to rely on "slow-twitch" oxidative fibers. This is where true postural endurance is built. If you can sustain a steady, level hip position through this window, your body is demonstrating the capacity to handle prolonged periods of standing and walking without fatigue-related form breakdown.
Phase 3: The Longevity Standard (60 to 90+ Seconds)
Reaching the 90-second mark represents a high level of neuromuscular efficiency. At this stage, the body is no longer "fighting" the gravity of the position. Instead, it has achieved a state of balanced tension. This is the goal for anyone looking to maintain an active, injury-free lifestyle well into their later years.
Supporting Data: Why Gluteal Health is Non-Negotiable
Research consistently highlights the link between hip strength and mobility. A study published in the Journal of Geriatric Physical Therapy indicates that weakness in the hip extensors is a primary predictor of gait instability in older adults. When the glutes are weak, the pelvis often tilts forward (anterior pelvic tilt), putting excessive strain on the lumbar spine.
Furthermore, the "Time Under Tension" (TUT) principle is crucial here. Unlike a dynamic movement like a squat, where momentum can sometimes hide muscular weaknesses, the bridge hold forces the glutes to remain under constant, static tension. This specific type of loading builds the connective tissue integrity around the hip joints, providing a protective cushion against the wear and tear of aging.
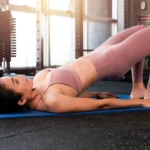
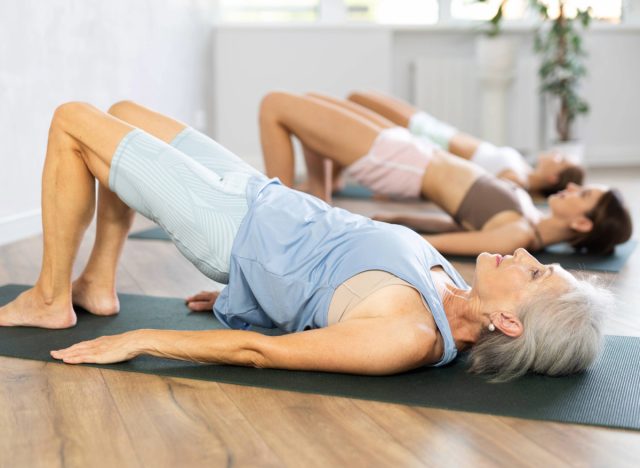
The Mechanics of the Move: A Step-by-Step Guide
To ensure you are testing your strength—and not just straining your lower back—you must adhere to strict form protocols.
The Setup:
- Positioning: Lie flat on your back with your feet planted firmly on the floor, roughly hip-width apart. Your heels should be close enough to your glutes that you can almost touch them with your fingertips.
- The Engagement: Before lifting, inhale and brace your core as if you are about to take a punch. This "locks" your ribcage and prevents the lower back from overarching.
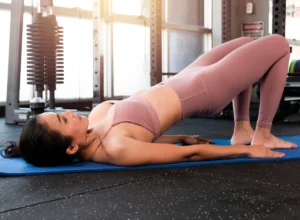
- The Drive: Exhale as you drive through your heels, lifting your hips toward the ceiling. Your goal is a straight line from your knees to your shoulders.
- The Squeeze: At the top of the movement, engage your glutes fully. Avoid the temptation to use your lower back to "push" the hips higher.
The Movement Standard:
The timer starts the moment your hips reach the top of the bridge. The timer stops the moment your form breaks. Form breaks include:
- The pelvis dipping on one side.
- The lower back arching excessively (often felt as tension in the lumbar region).
- The feet sliding outward or lifting off the floor.
Interpreting Your Results
What does your time actually mean? Use this scale as a benchmark for your current status:
- 0–30 Seconds (Foundation Phase): Your glutes fatigue quickly. This suggests you are likely over-relying on your lower back for daily activities. Prioritize "glute activation" exercises—like bird-dogs or clamshells—before attempting longer bridge holds.
- 30–60 Seconds (Active Support Phase): You have a solid base. You possess enough strength for standard daily movements, such as walking and moderate stair climbing. You are in the "safety zone" for injury prevention.
- 60–90 Seconds (Stability Phase): You have excellent gluteal endurance. Your hips are capable of staying organized under fatigue, which provides significant protection for your spine and knees during more strenuous activities.
- 90+ Seconds (The Longevity Elite): You have achieved a superior level of muscular endurance. Your hips are not just strong; they are resilient. This level of control is highly protective against common age-related mobility declines.
Implications for Longevity and Quality of Life
The implications of a strong bridge hold extend far beyond the gym floor. When you possess the gluteal endurance to keep your pelvis stable, you reduce the "energy cost" of every step you take.
Consider the act of walking uphill or climbing stairs. These movements require the pelvis to stay level while the legs move independently. If your glutes are weak, your hips will "wobble," causing your body to expend extra energy to stay upright. This is why many people over 60 feel disproportionately exhausted after relatively short walks. By strengthening the glutes through the bridge hold, you are essentially increasing your "metabolic efficiency," allowing you to do more with less effort.
How to Progress: Beyond the Basic Hold
Once you can comfortably hold a standard bridge for 90 seconds, it is time to progress. The goal is not just to hold for longer, but to challenge the hips in different planes of motion.
1. The Single-Leg Bridge
This is the ultimate test of pelvic stability. By removing one point of contact, you force the glutes of the standing leg to work twice as hard to keep the pelvis level. This is the gold standard for correcting side-to-side imbalances.
2. The Marching Bridge
While holding the bridge position, slowly lift one foot off the floor, then the other, in a marching motion. The goal is to keep the hips perfectly still as you shift weight. This requires significant core and glute coordination.
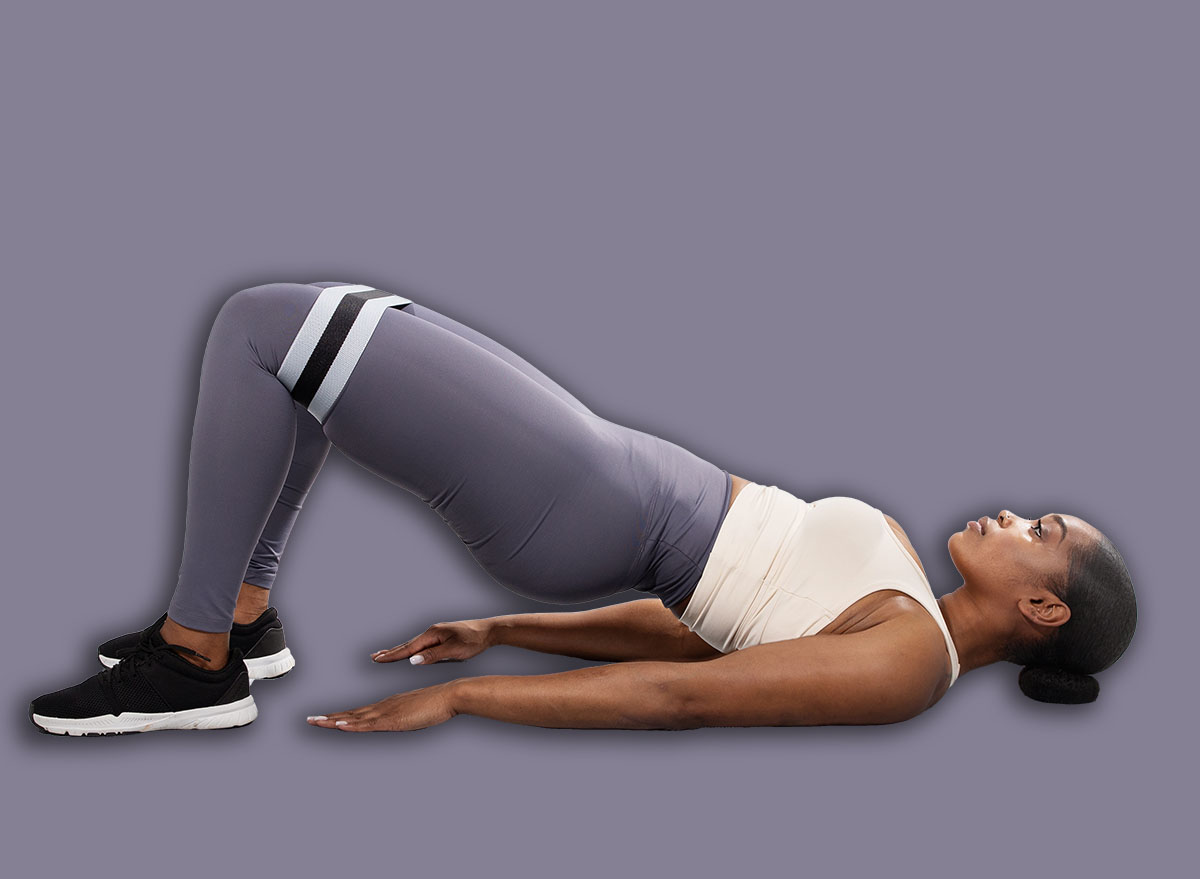
3. The Banded Bridge
Place a resistance band just above your knees. As you push your hips up, push your knees outward against the band. This activates the gluteus medius—a muscle crucial for side-to-side stability and preventing knee pain.
4. The Elevated Bridge
Place your feet on a low bench or a sturdy chair. This increases the range of motion and shifts more of the load onto the hamstrings and glutes, providing a greater challenge for the posterior chain.
Professional Perspective: The "Movement First" Philosophy
In the world of professional strength coaching, we often remind clients that "strength is a skill." The glute bridge is not just a test; it is a skill you must practice. As we age, the tendency to adopt sedentary habits is high. By incorporating a bridge hold into your daily routine—perhaps as a morning ritual or a transition between tasks—you are providing your body with the "reset" it needs.
It is vital to listen to your body during these tests. If you feel pain in the lower back, stop immediately. The glute bridge should be felt in the glutes and, to a lesser extent, the hamstrings. If the lower back is doing the heavy lifting, your setup is likely incorrect. Take the time to reset, brace your core, and try again.
Conclusion: A Lifetime of Motion
The 90-second bridge test is a simple, no-equipment-required way to hold yourself accountable to your physical future. It strips away the complexity of modern exercise and returns to the raw, functional truth: if your hips are strong, your body is capable.
Whether you are currently hitting 20 seconds or soaring past the 90-second mark, the goal remains the same—consistency. By prioritizing the health of your posterior chain, you are investing in the most important asset you own: your ability to move through the world with freedom, power, and confidence. Start today, hold your ground, and let your strength be your foundation.