










The pull-up and chin-up occupy a hallowed space in the pantheon of fitness. They are the ultimate metrics of upper-body strength, requiring nothing more than a bar and the ability to conquer gravity. When executed with precision, these movements do more than just build a beefier back; they forge cannonball biceps, improve functional posture, and develop a grip strength that translates to every other lift in the gym.
However, a cursory glance around any commercial gym reveals a troubling trend: many lifters are leaving significant gains on the floor. The pull-up is frequently treated as a chaotic, momentum-driven struggle, with athletes relying exclusively on their arm strength rather than tapping into the kinetic potential of their entire body. The reality is that the first rep begins long before the elbows bend—it starts the moment your skin makes contact with the bar.
The Foundation of Force: Why Setup Matters
In biomechanics, the body functions as a kinetic chain. When you approach a pull-up bar, you are not merely preparing to move your arms; you are preparing to engage a complex system of levers. If you skip the setup, you create "energy leaks." An energy leak occurs when force is dissipated through loose joints, unbraced cores, or improper alignment rather than being channeled into the target muscles: the latissimus dorsi, rhomboids, and biceps.
Effective reps are born from a comprehensive setup: the active hang, packed shoulders, a braced core, engaged glutes, and a body that functions as a single, rigid unit. By neglecting these details, you are essentially trying to fire a cannon from a canoe. To maximize your output, you must treat your body as a high-performance machine that requires calibration before every single repetition.
A Chronological Guide to the Perfect Pull-Up Setup
To master the pull-up, one must view the movement as a progression of deliberate, sequential actions. Following this checklist ensures that every ounce of energy is directed toward muscle hypertrophy and strength development.
Step 1: Strategic Grip Selection
Before you even reach for the bar, you must define your objective. The choice between a pull-up (pronated/overhand) and a chin-up (supinated/underhand) alters the recruitment pattern of your musculature.
- The Pull-Up: Utilizing a pronated grip with hands slightly wider than shoulder-width targets the lats for width and upper-back thickness.
- The Chin-Up: The supinated grip places the biceps in a more mechanically advantageous position, allowing for greater load and increased emphasis on the arm flexors.
Pro-Tip: Do not simply grab the bar. Grip it with intent. Squeeze the bar as hard as humanly possible for two seconds before initiating movement. This "irradiation effect" sends a neurological signal to the rest of your body to prepare for a heavy load.
Step 2: Optimizing Hand Position
Common wisdom often suggests that a wider grip equals a wider back. This is a physiological fallacy. While an excessively wide grip increases the stretch, it also limits your range of motion and places the glenohumeral joint in a compromised, unstable position. Stick to shoulder-width or slightly beyond to maintain shoulder health and maximal force production. Aim to keep your knuckles pointing toward the ceiling to ensure your wrists remain neutral, preventing the "hook" that leads to premature grip fatigue.
Step 3: Creating Tension Through the Hands
Your hands are the only point of contact with the bar. If your hands are loose, your entire structure will be unstable. Think of your hands as "hooks" that are actively trying to tear the bar apart. By visualizing yourself pulling the bar outward (as if trying to bend it), you activate the external rotators of your shoulders, creating a more stable environment for your lats to pull.
Step 4: The Active Hang
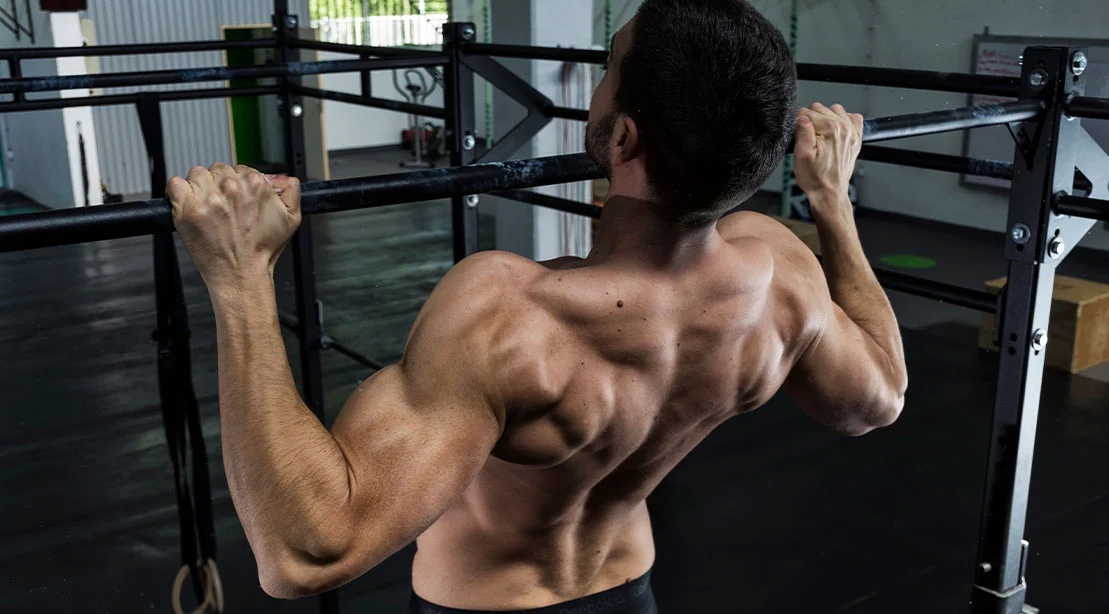
This is the most misunderstood phase of the lift. A "dead hang" is a resting position; an "active hang" is the launchpad. Before you pull, you must execute scapular depression—pulling your shoulder blades down into your back pockets. This preloads the lats and ensures that the pull begins from the back, not the traps or the shoulders. If you are not in an active hang, you are starting the rep from a position of weakness.
Step 5: Bracing the Core and Glutes
Once you are hanging, your body should resemble a stiff, unyielding plank. By bracing your abdominals and squeezing your glutes, you eliminate the "swing" that plagues many amateur lifters. A tight core acts as a bridge, transferring the force generated by your back directly into the bar. If your legs are flailing, your core is failing.
Step 6: Neutral Spine and Neck Alignment
It is common to see lifters craning their necks to get their chin over the bar. This creates a bottleneck in the cervical spine. Your neck should remain in a neutral, long position. Focus on driving your chest toward the bar rather than your chin. When your chest reaches the bar, your chin will naturally clear it, keeping your spine safe and your tension focused on the target muscles.
Supporting Data: The Physics of the Pull
Research into electromyography (EMG) consistently shows that latissimus dorsi activation is significantly higher when the scapulae are retracted and depressed prior to the initiation of the pull. Studies on "full-body tension" in calisthenics indicate that individuals who engage their core and glutes during hanging movements experience a 15–20% increase in total repetition volume compared to those who remain "loose." This is because the nervous system is more efficient at recruiting muscle fibers when the body is in a stable, pressurized state.
Official Perspectives: The Coaching Consensus
Strength coaches and biomechanists generally agree that the "dead stop" method is the gold standard for hypertrophy. Elite gymnasts and calisthenics athletes emphasize that "momentum is the enemy of development." By removing the "bounce" or "kip," you force the muscles to perform the entirety of the concentric phase.
"The most common mistake," says one industry expert, "is the failure to bridge the gap between the hang and the pull. If you don’t engage the scapula first, you’re essentially performing a bicep-heavy movement that places your shoulders at high risk of impingement. You have to earn the pull with your setup."
Implications for Your Training
Adopting this rigorous setup protocol will likely result in an immediate decrease in your total repetition count. Do not be discouraged. This is not a loss of strength; it is a gain in quality. By eliminating the "shortcuts"—such as using leg momentum, initiating with the arms, or "chin-crane" mechanics—you are forcing your muscles to work harder, not smarter.
The Path Forward:
- Stop counting, start assessing: If you can’t complete a rep with perfect form, regress to a band-assisted variation or a negative-only pull-up.
- Prioritize the "Active Hang" drill: Dedicate five minutes before your next back session to just practicing the scapular pull-up.
- The "Ironing Board" Rule: Treat every rep as if you are being filmed. If your body deviates from that stiff, plank-like position, stop the set and reset.
The pull-up is an art form as much as it is a lift. By mastering the setup, you aren’t just performing an exercise; you are building the foundation for a wider, stronger, and more resilient back. The "wings" you desire are not built by rushing to the bar—they are built by the seconds of tension you create before you ever leave the ground. Embrace the process, prioritize the setup, and watch as your strength ceiling rises to meet your new, uncompromising standards.