










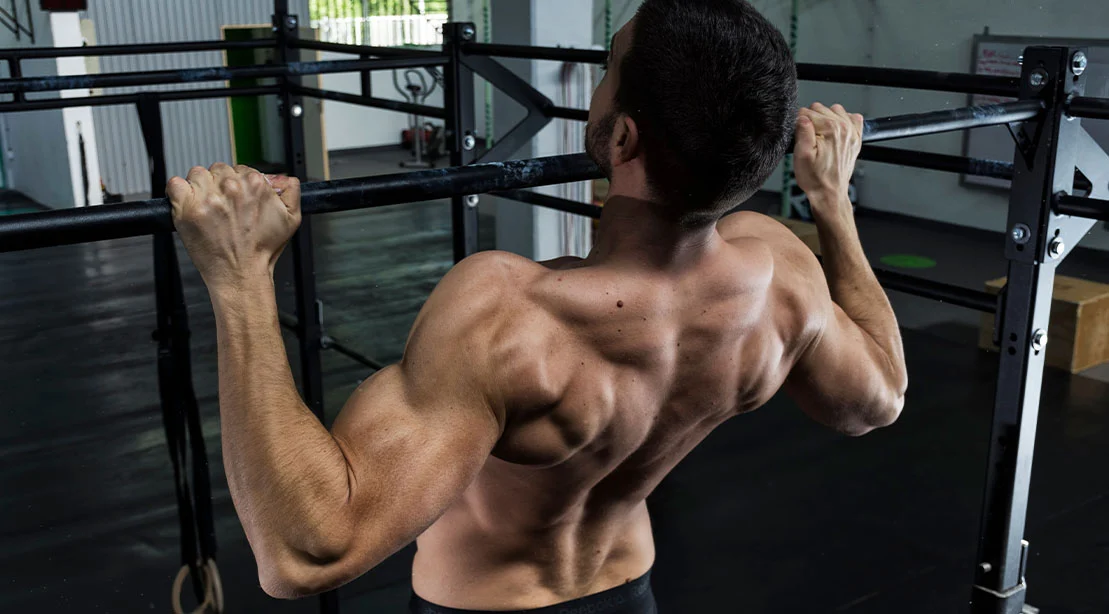
The pull-up and its cousin, the chin-up, remain the gold standard of upper-body development. Often cited as the ultimate “bodyweight benchmark,” these movements require nothing more than a bar and the resolve to hoist one’s own mass against gravity. When performed correctly, they are peerless in their ability to carve a wider back, build thick, powerful arms, and forge a grip strength that translates to virtually every other lift in the gym.
However, a recurring observation among elite strength coaches is that the majority of gym-goers are leaving significant hypertrophy and strength gains on the table. The issue is rarely a lack of effort; rather, it is a failure of mechanical execution. Many lifters treat the pull-up as a purely "arm-driven" exercise, bypassing the complex, full-body integration required to maximize muscle recruitment.
True mastery of the pull-up does not begin when your chin clears the bar; it begins the moment your hands make contact with the steel. By failing to establish full-body tension before the first repetition, lifters suffer from “energy leakage”—a phenomenon where force is dissipated through loose joints and unstable posture rather than being directed into the primary movers.
The Chronology of a Perfect Repetition
To understand why so many struggle, we must reframe the pull-up as a kinetic chain that starts at the hands and finishes at the glutes. The following seven-step protocol outlines the professional approach to setting up for maximum output.
Step 1: Choosing Your Tactical Grip
The setup for pull-ups (pronated/overhand) and chin-ups (supinated/underhand) is fundamentally similar, yet they place distinct mechanical demands on the body. The pronated grip generally places more emphasis on the latissimus dorsi and the muscles of the upper back, while the underhand grip increases the involvement of the biceps and allows for a slightly greater range of motion. Regardless of the choice, the "intent" remains the same: grip with absolute purpose. Professional lifters often visualize leaving their fingerprints on the bar, squeezing it with maximal force for two seconds before initiating movement to prime the nervous system.
Step 2: Optimizing Grip Width and Hand Mechanics
A common fallacy is that a wider grip is inherently superior for lat development. While a wide grip increases the aesthetic "spread" of the movement, it often forces the shoulder into a compromised, abducted position that reduces the total range of motion and limits the recruitment of the lower lats. A shoulder-width grip, or one only slightly wider, provides the optimal leverage for most lifters. To maximize this, think "knuckles to the ceiling"—an external cue that rotates the wrists and sets the elbows in a more favorable position for a strong pull.
Step 3: Generating Torque Through the Hands
Because the hands are your only point of contact with the external load, they must act as a stabilizer. By "rooting" your hands—applying deliberate outward tension as if attempting to pull the bar apart—you create a torque that helps lock the shoulder blades into a stable position. This minor adjustment prevents the shoulders from rolling forward during the ascent.
Step 4: The Active Hang (The Foundation)
The transition from a dead hang to an active hang is the most critical juncture in the exercise. In a dead hang, your joints are passive; in an active hang, your musculature is engaged. By tucking your shoulder blades into your "back pockets" (scapular depression), you preload the lats. This is not just a safety measure for the rotator cuff; it is the engine start for your pull. If you cannot hold an active hang, you are not yet ready to perform a high-volume set of pull-ups.
Step 5: Establishing Full-Body Tension (The Kinetic Chain)
A pull-up is not an upper-body exercise; it is a whole-body movement. If your lower body is swaying or limp, your core is not transferring force effectively. By bracing your abdominals and squeezing your glutes, you transform your body into a single, rigid lever. This eliminates "energy leaks"—the subtle wobbles and swings that dissipate the force generated by your back.
Step 6: Neutral Spine and Neck Alignment
It is common for lifters to crane their necks to reach the bar, but this compromises spinal alignment and encourages the lower back to arch excessively. A neutral spine, where the head remains in line with the torso, ensures that the effort remains focused on the back muscles rather than the delicate structures of the cervical spine.
Step 7: The Final Pre-Flight Checklist
Before the first rep, perform a mental sweep:
- Hands: Squeezing the bar and pulling it apart.
- Shoulders: Depressed (active hang).
- Core: Braced hard.
- Glutes: Contracted.
- Head: Neutral position.
Supporting Data and Mechanical Implications
The science of biomechanics supports this structured approach. Research into electromyography (EMG) during vertical pulling movements indicates that scapular depression significantly increases the activation of the latissimus dorsi before the elbow flexors even begin to contract. When a lifter initiates a pull-up by flexing the elbows (the "biceps-dominant" error), they effectively bypass the lats, leading to early fatigue and stunted back growth.
Furthermore, the "rigid lever" theory of force production is well-documented in strength sports. In movements like the deadlift or the overhead press, a braced core is mandatory for power transfer. The pull-up is no exception. A study on kinetic energy transfer suggests that when the core is braced, the stability provided to the lumbar spine allows the lats to contract with approximately 15-20% more force, as the body no longer has to expend energy to stabilize against swinging.
Expert Consensus: The "Don’ts" of Pulling
Elite coaches, including those at the National Strength and Conditioning Association (NSCA), consistently highlight the following common pitfalls as the primary reasons for plateauing:
- The "Arm-First" Initiation: This is the most prevalent error. If the elbows bend before the shoulder blades move, you are training your arms, not your back. The fix is simple: treat the pull-up as a two-stage process—first, the scapular pull, then the elbow drive.
- Momentum/Kipping: While functional fitness modalities may utilize momentum, for hypertrophy and pure strength, it is a liability. Momentum masks weakness and prevents the lats from experiencing the "time under tension" required for growth.
- Chin-Leading: This is a compensation for a weak pull. By focusing on driving the elbows toward the ribs rather than the chin over the bar, the lifter maintains a superior path for the chest to rise, ensuring the back does the heavy lifting.
Implications for Your Training Program
The implications of adopting this disciplined setup are profound. By mastering the setup, a lifter can transition from "struggling for reps" to "commanding the movement." This shift in focus does not just change how the exercise feels; it fundamentally changes the adaptation of the muscle tissue.
When you prioritize the setup, you are essentially training your nervous system to fire in the correct sequence. Over time, this becomes subconscious. You will find that your total rep count may drop initially as you discard momentum, but the quality of the remaining reps will be vastly superior. This creates a higher stimulus-to-fatigue ratio, which is the cornerstone of long-term muscle growth.
Ultimately, the pull-up is a mirror of your discipline. If you take the time to set the foundation—to pack the shoulders, brace the core, and engage the glutes—you will find that your back grows wider, your grip grows stronger, and your performance on every other upper-body lift improves as a byproduct. The bar does not lie; it only reveals the efficiency of the body beneath it. If you want a bigger back, stop just pulling, and start engineering the movement.