


Watching a seasoned lifter execute a set of Glute-Ham Raises (GHR) is akin to watching a master class in biomechanical efficiency. They descend with a rigid, pillar-like torso, only to explode back to the starting position with nothing but the sheer force of their hamstrings and glutes. To the untrained eye, it looks effortless. To the novice who tries to mimic it without preparation, it is a recipe for a humbling crash.
The Glute-Ham Raise is widely regarded by strength coaches and physical therapists as the "gold standard" for posterior chain development. Unlike the leg curl, which isolates the hamstrings, the GHR recruits the entire back-side musculature in a functional, integrated pattern. However, the delta between a transformative exercise and a frustrating, ineffective movement lies entirely in the setup. If you do not master the machine before you move your body, you are merely going through the motions.
Main Facts: The Biomechanics of the GHR
The Glute-Ham Raise is unique because it forces the hamstrings to function in two roles simultaneously: knee flexion and hip stabilization. Because the hamstrings cross both the knee and hip joints, the GHR creates a high-tension environment that few other movements can replicate.
To reap these benefits, you must treat the GHR machine not as a piece of gym equipment, but as a precision instrument. Every machine is calibrated differently; footplate angles, pad density, and pivot points vary by manufacturer. Whether you are using a Rogue Abram GHD or a generic commercial machine, the objective remains the same: create a stable foundation that allows for a full range of motion without compensating through the lower back.
Chronology: The Step-by-Step Setup Protocol
Success in the GHR is not accidental; it is procedural. To ensure your safety and maximize hypertrophy, follow this seven-step protocol every time you approach the machine.
Step 1: Precision Calibration (Footplate and Pad)
Before you even think about engaging your muscles, you must calibrate the machine to your anthropometry. If your knees are too far forward on the pad, you will feel trapped, preventing the hamstrings from elongating. If they are too far back, you will slide off.
- The Golden Rule: Your knees should rest just behind the apex (the crest) of the pad. This placement allows the hamstrings to move through their full contractile range.
- The Test: Perform a "bodyweight check." Lean forward slowly. If your knees feel unsupported or your hips immediately hinge, stop. Adjust the footplate by a notch until the descent feels balanced.
Step 2: The Anchor Point (Foot and Ankle Stability)
Your feet are the "terminal" of the movement. If your feet are loose, the force you generate will be dissipated before it reaches your hamstrings.
- The Technique: Drive your feet into the footplate as if you are trying to push the machine away from you. This creates a reflexive tension that travels up through your calves and into your hamstrings.
- Coach’s Tip: If you feel your feet shifting mid-set, it is a sign that your ankle stability is failing. Reset your stance and focus on "wedging" your feet against the pad.
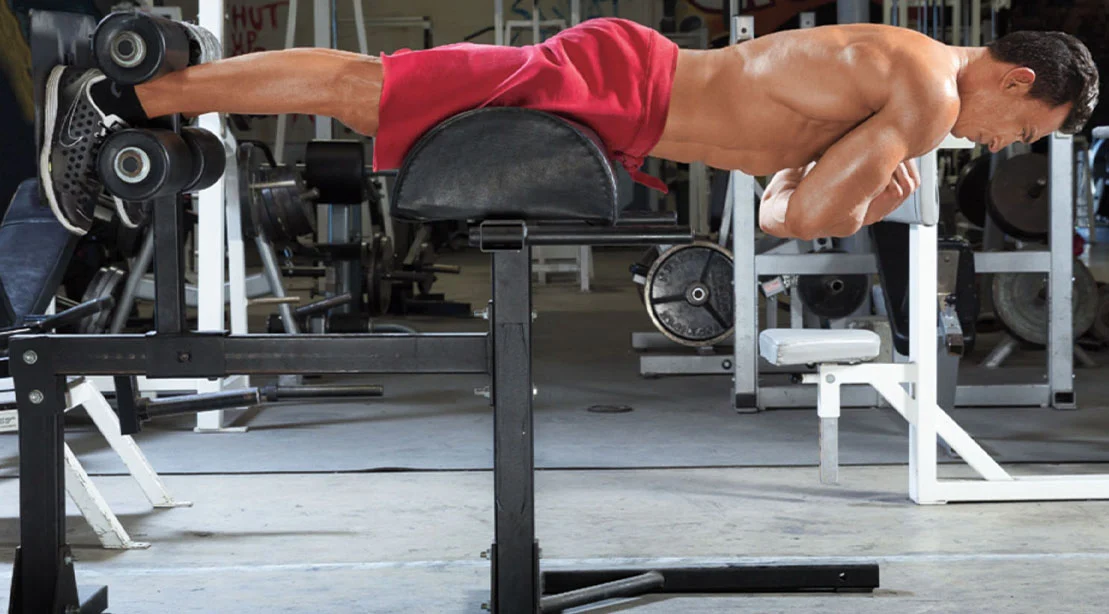
Step 3: Establishing the "Straight-Line" Posture
Think of your body as a single, unbreakable lever. From your head to your knees, there should be no curvature.
- The Visual Check: Have a partner record a side-profile video. If you see your lower back arching or your hips "piking" (bending), you have broken the chain.
- The Cue: Imagine your body is a solid piece of steel. Keep your ribs stacked directly over your pelvis to maintain a neutral spine.
Step 4: Loading the Tension (Pre-Rep Engagement)
The most common error is starting the movement from a relaxed state. You cannot "turn on" your hamstrings once the movement has already begun; you must be loaded before you move.
- The Deadlift Parallel: Just as you pull the slack out of a barbell before a heavy deadlift, you must pull the "slack" out of your hamstrings.
- The Squeeze: Consciously squeeze your glutes and pull your heels into the pad before you initiate the descent. If the first two inches of your rep feel "floaty," you haven’t engaged enough tension.
Step 5: Arm Positioning for Leverage
Your arms are a variable tool for intensity.
- Beginner: Use your hands to provide a slight push against the frame if you cannot complete a full rep.
- Intermediate/Advanced: Cross your arms over your chest. This is the "standard" difficulty.
- Elite: Place your hands behind your head. This increases the lever length of your torso, significantly increasing the difficulty of the rep.
Step 6: The Valsalva Maneuver (Breath and Brace)
The core is the stabilizer that protects your spine during the GHR. If your core is soft, your lumbar spine will compensate for the work your hamstrings should be doing.
- The Brace: Take a deep breath into your diaphragm, lock your ribs down, and create internal pressure. Do not release this pressure until the rep is completed.
Step 7: The "Green Light" Final Checklist
Before the first rep, run this mental scan:
- Knees: Just behind the pad crest?
- Feet: Driving firmly into the plate?
- Spine: Neutral and rigid?
- Core: Braced and locked?
- Tension: Hamstrings and glutes active?
Supporting Data: Why Proper Form Trumps Weight
Clinical research into posterior chain exercise emphasizes the importance of eccentric loading. The Glute-Ham Raise is particularly effective because it forces the hamstrings to resist gravity while under stretch. When form breaks down—specifically when the back takes over—the electromyographic (EMG) activity in the hamstrings drops significantly.
Studies suggest that when a lifter "cheats" by bending at the hips (turning the GHR into a back extension), they reduce the activation of the biceps femoris by nearly 30%. In short: doing 5 perfect reps with a straight spine is more effective for muscle growth than 15 sloppy reps that rely on momentum and lumbar hyperextension.
Official Perspectives: The Coaching Consensus
Strength and conditioning coaches universally agree that the GHR is a "skill-based" movement. "We treat the GHR as a movement pattern, not just an exercise," says one lead performance coach. "If an athlete can’t hold a perfect plank, they shouldn’t be on the GHR machine. It’s too high-leverage to do with poor core stability."
The consensus is clear: the machine is not the problem; the lack of foundational tension is. Coaches emphasize that the GHR should be programmed toward the middle or end of a workout, once the athlete is fully warmed up and their central nervous system is primed for high-tension work.
Implications: The Long-Term Benefits
The implications of mastering the GHR are profound. Consistent, high-quality training on this machine results in:
- Enhanced Sprint Speed: By strengthening the hamstrings at the knee joint, athletes see marked improvements in their top-end speed.
- Lower Back Health: By isolating the posterior chain, the GHR reduces the need for the lower back to "assist" in lower-body movements.
- Aesthetic Development: The GHR is unmatched for creating the "shelf" look in the glutes and the thick, dense hamstring look that many seek in bodybuilding.
Summary of Common Mistakes
- The Back Extension Trap: If you feel this in your lower back, you are likely leading with your chest. The Fix: Keep your ribs tucked and drive through your heels.
- The "Hinge" Effect: If you bend at the hips, you are losing the intended stimulus. The Fix: Treat the torso as a rigid beam. If you cannot maintain the line, decrease the range of motion until your strength catches up.
Wrapping Up
The Glute-Ham Raise is often called the "king" of hamstring exercises, but it is a monarch that demands respect. It is a skill that must be honed before it can be exploited for strength. By dialing in your setup, locking in your body position, and treating every rep as a practice of tension, you transition from a casual lifter to a master of the posterior chain. Don’t rush the process; the gains you build by doing it right will far outweigh the ego-driven reps of those who refuse to learn the setup.