






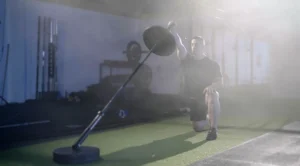



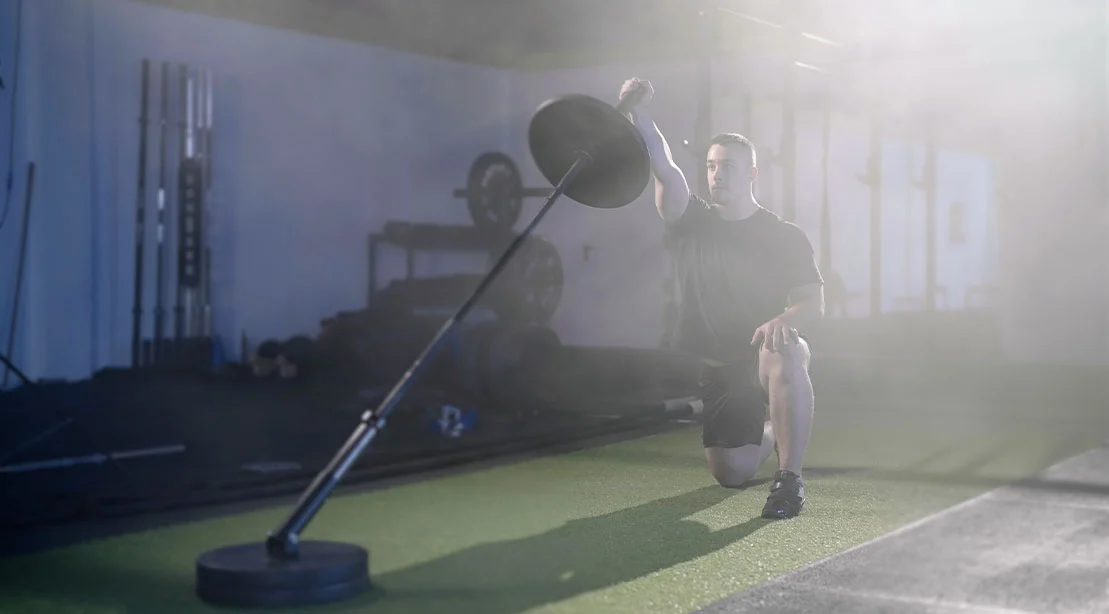
The half-kneeling landmine press is a staple in the modern strength and conditioning playbook. It is a movement frequently prescribed for its ability to build unilateral shoulder stability, core strength, and overhead mobility. Yet, despite its reputation as a "simple" exercise, it is perhaps one of the most poorly executed movements in the gym.
Why the discrepancy? The landmine press is deceptive. Because it uses a fixed pivot point, many lifters assume they can simply walk up to the bar and push. However, the nuance lies in the geometry of the setup. Limb length, hand size, and individual biomechanics mean that a "one-size-fits-all" approach is destined to fail. When dialed in, the movement provides a foundation for bold, resilient shoulders. When ignored, you spend the entire set fighting the equipment rather than training your muscles.
This guide serves as your definitive technical manual for mastering the half-kneeling landmine press.
The Core Mechanics: Why Setup Dictates Performance
To understand why the setup is non-negotiable, one must understand the biomechanical requirements of the landmine press. Unlike a standard overhead barbell press, the landmine press follows an arc. This diagonal path challenges the stability of the scapula and requires the core to resist rotational forces that try to pull the torso toward the bar.
The Anatomy of Stability
The half-kneeling position effectively removes the legs from the equation, placing the burden of stabilization on the core and the glutes. If your setup is flawed, you create "energy leaks." An energy leak occurs when the force you generate from your working arm is dissipated through a loose core or an unstable base. By the time the force reaches the weight, you have already sacrificed the potential for hypertrophy and strength gains.
Step-by-Step Execution: A Chronological Guide
Precision is the hallmark of the elite athlete. Follow this chronological checklist to ensure every repetition is as productive as the last.
Step 1: Navigating the Knee Choice
The first decision is which knee to place on the ground.
- Contralateral (Opposite knee down): If pressing with your right arm, place your left knee down. This is the gold standard for most lifters as it creates a diagonal line of tension through the core, which is excellent for anti-rotational training.
- Ipsilateral (Same knee down): If pressing with your right arm, place your right knee down. This version is more challenging for lateral stability.
Coach’s Advice: Start with the contralateral version to build your baseline. Once you have mastered the stability, rotate in the ipsilateral setup to identify which variation offers the most direct power output without compensatory leaning.
Step 2: Optimizing the Base
Your legs are the anchors of this movement. Plant your front foot so that the ankle is directly beneath the knee, creating a 90-degree angle. Your back knee should be positioned directly under the hip.
- The "Railroad Tracks" Cue: Imagine your legs are on two separate railroad tracks. If you put your feet directly in line (like a tightrope), you will lack lateral stability.
- The Glute Squeeze: Squeeze the glute on the side of the down-knee. This serves two purposes: it locks the pelvis into a neutral position and prevents the lower back from hyperextending.
Step 3: Selecting Your Grip
The grip is the primary interface between your nervous system and the load.
- The Cupped Grip: Ideal for those with smaller hands. Cup the end of the barbell in your palm, wrapping your fingers securely around the end of the sleeve.
- The Sleeve Grip: For lifters with larger hands, wrapping the fingers around the sleeve itself provides a more secure feel.
- The Golden Rule: Regardless of the grip, your knuckles should point toward the ceiling. Avoid a "broken wrist" position where the bar forces your hand backward; this is the quickest route to joint discomfort.
Step 4: Establishing Distance
Distance from the landmine is the most common point of failure. If you are too close, you will be cramped, forcing your elbow into an awkward, flared position. If you are too far, you will be forced to reach forward, which creates unnecessary strain on the lumbar spine.
Your "sweet spot" is the position where, when holding the bar, your ribs remain perfectly stacked over your hips. If you find your chest flaring or your back arching to compensate for the distance, shuffle forward or backward until you can remain vertical.
Step 5: The Pressing Path
As you begin the ascent, your elbow should stay tucked slightly in front of the hand. Because the bar is moving in an arc, your forearm should follow the trajectory of the bar. Visualize the path as a smooth diagonal line. Do not "shrug" the shoulder toward the ear at the top of the movement; keep the shoulder blade depressed and stable throughout the entire range of motion.
Step 6: The Pre-Lift Brace
Before the first rep begins, you must create "whole-body tension." Inhale deeply into your abdomen, bracing your core as if you are about to take a punch. Maintain that tension throughout the duration of the set. If you breathe out fully and lose that brace, you lose the foundation of the press.
Supporting Data: The Impact of Proper Alignment
Research into unilateral training suggests that movements like the landmine press are superior to bilateral (two-handed) pressing for addressing muscular imbalances. A study on rotational stability indicates that when the core is forced to stabilize against an asymmetric load—such as the landmine—the activation of the obliques and the multifidus increases by nearly 20% compared to traditional overhead pressing.
However, these gains are only realized if the lifter maintains the "stack." When the rib cage flares, the diaphragm loses its ability to pressurize the abdominal cavity, which directly correlates to a decrease in force production at the shoulder. Consequently, proper setup is not just about injury prevention; it is an optimization strategy for peak strength.
Official Perspectives: The Coaching Consensus
High-performance coaches emphasize that the landmine press is an "anti-movement" exercise. The primary goal is not just to push the weight, but to prevent the body from moving in response to the weight.
- On Compensations: Many lifters mistakenly use their lower back to "assist" the press when the shoulders fatigue. Coaches argue that the moment the lumbar spine loses its neutral position, the set should be considered finished.
- On Progressive Overload: While it is tempting to load heavy plates immediately, the landmine press rewards technical mastery. Coaches advise that if you cannot complete 10 perfect repetitions with a lighter load, adding weight will only solidify poor motor patterns.
Implications for Long-Term Training
The half-kneeling landmine press is a "keystone" exercise. Because it teaches the lifter to separate shoulder movement from spinal movement, it has massive carryover to other lifts.
Shoulder Health and Longevity
By allowing the scapula to move more naturally through the upward arc of the press, the landmine version is often more shoulder-friendly than a strict military press for those with limited overhead mobility. It allows the lifter to train the overhead pattern without the "impingement" sensation often associated with fixed-barbell pressing.
Correcting Imbalances
For lifters who have spent years training primarily with machines or heavy barbells, the landmine press acts as a diagnostic tool. It will quickly reveal if your left side is significantly weaker or less stable than your right. By dedicating time to the setup and focusing on the unilateral nature of the movement, you create a symmetrical, injury-resistant physique.
The Green Light Checklist: Final Review
Before you initiate your next set, ensure you can check off these five boxes:
- Stable Base: Is your front foot flat, and are your knees on "railroad tracks"?
- Neutral Spine: Are your ribs stacked directly over your pelvis?
- Active Tension: Is your glute squeezed and your core braced?
- Solid Grip: Is your wrist straight, with knuckles pointed toward the ceiling?
- Clean Path: Does the elbow track in front of the wrist throughout the arc?
If the answer to all five is yes, you are ready to train. The half-kneeling landmine press is more than just a shoulder builder; it is a masterclass in tension, stability, and biomechanical precision. Stop rushing your setup, stop leaking energy, and start building a foundation that will support your strength goals for years to come.