











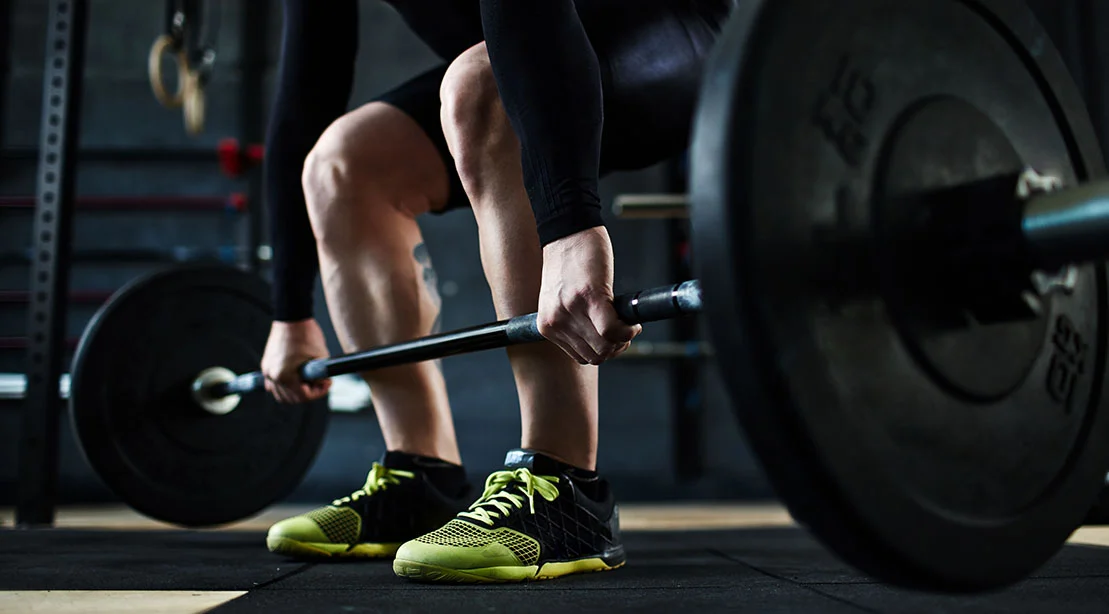
For many athletes and gym-goers, the deadlift is the ultimate litmus test of raw strength. It is a primal movement—the act of picking a heavy object up from the ground and placing it back down. However, the simplicity of the movement is deceptive. While the goal is straightforward, the execution is a complex synchronization of anatomy, tension, and leverage. Often, performance plateaus, nagging lower back pain, or technical breakdowns can be traced back to a single, critical moment: the setup.
If you cannot "own" the bottom position of your deadlift, you are fighting an uphill battle against your own mechanics. By refining your starting position with targeted mobility and stability work, you can transform a disjointed, risky lift into a powerful, efficient display of force.
The Anatomy of the Deadlift Setup: Why the Bottom Matters
Deadlift performance issues rarely begin halfway through the pull; they almost always originate at the floor. The "starting position" is the foundation upon which the entire lift is built. If your foundation is cracked—whether through limited hip mobility, poor lat engagement, or a loss of hamstring tension—the rest of the lift is destined to suffer.
When the hips are positioned too low, the deadlift transforms into a poor imitation of a squat, causing the knees to push the bar forward and away from the midfoot. When the lower back rounds to compensate for tight hamstrings, the spinal column is placed in a compromised position under load. Conversely, starting with the hips too high turns the lift into a stiff-legged variation that robs the quads of their ability to contribute to the initial break from the floor.
"You need sufficient mobility in the hips, hamstrings, adductors, ankles, and upper back to get to the bottom," says renowned strength coach Matt Wenning. "But mobility alone isn’t enough. You also need the stability and body awareness to create tension to cement that starting position."
The Litmus Test: Can You Own Your Position?
To determine if your setup is truly dialed in, perform a simple diagnostic test. Load a barbell with a modest weight—a single 45-pound plate on each side is sufficient—and approach the bar as you would for your working sets.
- The Stance: Place the bar directly over your midfoot.
- The Hinge: Hinge at the hips, grip the bar, and set your back.
- The Tension: Engage your lats, pull the slack out of the bar, and create full-body tension as if you are about to pull a personal record.
- The Hold: Maintain this static position for three seconds without lifting the weight.
During these three seconds, evaluate yourself. Are you shifting your weight forward onto your toes? Is your lower back rounding? Is the bar drifting away from your shins? If you cannot maintain a rigid, neutral, and powerful position for three seconds, you have identified a structural or technical weakness that no amount of extra weight will fix.
Key Components of a Clean Pull
A successful deadlift requires a synergistic relationship between several physiological factors. Understanding these components is the first step toward optimization.
Hip Flexion and Pelvic Control
The hips are the primary hinge of the deadlift. They must possess enough flexion to allow your torso to descend toward the bar without forcing the lumbar spine to compensate. If you lack the required range of motion, your body will inevitably "dump" the tension into your lower back, leading to the dreaded "cat back" that many lifters mistake for a stylistic choice.
Hamstring and Adductor Mobility
The hamstrings and adductors act as the "brakes" and "engines" of the posterior chain. If they are chronically tight, you will struggle to find a low enough starting position to engage the quads without losing your spinal alignment.
Ankle Mobility
While the conventional deadlift is not as ankle-dominant as a deep back squat, sufficient dorsiflexion is still required. Your knees must be able to track slightly forward to bring your shins into contact with the bar. If your ankles are stiff, you may find yourself forced into a wider stance or an awkward, "leg-straight" position that shifts the load entirely to your lower back.
Thoracic Position and Lat Engagement
The upper back acts as the rigid pillar of the deadlift. A neutral thoracic spine is essential for force transfer. Furthermore, engaging the lats—often cued as "squeezing an orange in your armpits"—is what prevents the bar from drifting away from your body. When the bar drifts, the lever arm lengthens, exponentially increasing the load on the lumbar spine.
Correcting Common Setup Mistakes
Before you add complex mobility drills to your routine, audit your setup for these common technical errors. Often, "tightness" is actually just poor technique.
- The "Squatty" Deadlift: If you drop your hips too low, you effectively turn your deadlift into a squat. This pushes the bar away from your center of gravity and loses the vital tension in your hamstrings. The Fix: Hinge at the hips first. Think "hip hinge," not "knee bend."
- Rounding the Lower Back: While elite powerlifters occasionally allow for minor flexion, it is a dangerous game for the recreational lifter. The Fix: Incorporate rack pulls or block pulls, which allow you to train the movement pattern at a height that accommodates your current mobility limitations.
- The Bar Drift: If the bar is not in constant contact with your shins, you are wasting energy. The Fix: Focus on pulling the bar into your legs throughout the entire range of motion, using your lats to keep it tight to your body.
Five Mobility Drills to Own the Bottom Position
If your mobility is truly the bottleneck, these five exercises, recommended by Coach Matt Wenning, are designed to build the range and control necessary for a elite-level deadlift.
1. Chair Sumo Deadlift
The chair provides a tactile target, forcing the lifter to push the hips back rather than just dropping them down. This is particularly useful for those who struggle with the "squatty" setup.
- Why it works: It forces hip abduction and external rotation while teaching the brain how to hinge correctly.
- Execution: Stand with a chair behind you. Assume a wide sumo stance. Hinge your hips back until they lightly touch the chair, then return to standing.
2. Half-Kneeling Hamstring Mobilization With Ankle Rocker
This is a dual-purpose drill that simultaneously targets the posterior chain and the ankle joint.
- Why it works: It mimics the specific requirements of the deadlift: a mobile hamstring and a stable, functional ankle.
- Execution: In a half-kneeling position, straighten the front leg to stretch the hamstring, then lean forward to drive the front knee over the toes to mobilize the ankle.
3. Goblet Prying Squat
While technically a squat variation, the prying motion is a masterclass in hip opening.
- Why it works: By using a kettlebell as a counterbalance, you can sit deeper into the hips, using your elbows to push the knees outward and open the adductors.
- Execution: Hold a kettlebell at your chest, squat down, and use your elbows to pry your knees apart, shifting your weight gently side-to-side.
4. Rockback Breathing With Double-Elbow Reach
This drill is about neurological "unwinding." Sometimes, the lats are so chronically tight that they pull the spine into extension, preventing a neutral starting position.
- Why it works: It encourages deep, diaphragmatic breathing while in a quadruped position, relaxing the paraspinal muscles.
- Execution: Get on all fours, push your hips back toward your heels, and reach your elbows forward on the floor while taking deep, controlled breaths.
5. Straight-Arm Band Pulldown Into Deadlift Hold
This is the ultimate "active" mobility drill, training the lats to stay engaged during the hinge.
- Why it works: It forces you to maintain tension in the lats against resistance, preventing the bar-drift issue before you ever touch a barbell.
- Execution: Attach a band to a high anchor point. Pull the band down toward your thighs, then hinge at the hips while maintaining that "lat-engaged" tension.
Implications for Future Performance
The deadlift is not merely an exercise; it is a skill. By shifting your focus from "how much weight can I move today" to "how well can I own my starting position," you create the potential for long-term progress.
The implications are clear: athletes who prioritize the setup spend less time recovering from lower back injuries and more time adding plates to the bar. Mobility work is not a separate entity from strength training; it is the prerequisite for it. By integrating these drills into your warm-up and technical practice, you ensure that when you finally reach down to grip that bar, you are not just pulling—you are setting the stage for a perfect, powerful lift.
Remember: the deadlift does not begin when the bar leaves the floor. It begins with the tension you create, the position you secure, and the mastery you exert over the bottom position. Own the bottom, and the top will take care of itself.