











The barbell overhead press (OHP) is often described by strength coaches as the "truth teller" of the gym. It is an exercise that strips away the vanity of heavy bench pressing and the crutch of lower-body momentum found in the push press. With nothing but the bar, your deltoids, and the gravity pulling against you, there is nowhere to hide. It is, quite literally, you versus the iron.
However, the very characteristic that makes the barbell so effective—its rigid, fixed nature—can also be its most significant liability. Because the barbell locks your hands into a fixed, pronated position, it demands a level of wrist mobility and structural alignment that many lifters simply do not possess. When the wrists become the "weakest link" in the kinetic chain, power output plummets, and the risk of injury rises.
In this comprehensive guide, we will analyze why the barbell overhead press frequently causes wrist discomfort, how you can troubleshoot your form, and which alternative exercises will keep your shoulders growing without compromising your joint health.
The Anatomy of the Problem: Why Does the Barbell Hurt?
To understand why your wrists are in pain, you must first understand the mechanics of a proper overhead press. The ideal rack position involves a vertical forearm stack, where the wrist is positioned directly over the elbow, and the barbell rests deep in the heel of the palm.
The Mechanics of Failure
When the barbell rolls toward your fingers, the center of mass shifts forward. To compensate and prevent the bar from falling, your wrists are forced into extreme hyperextension. This creates a "broken" lever, which is mechanically inefficient and places immense shear force on the small carpal bones of the wrist.
Several factors contribute to this breakdown:
- Bar Placement: If the bar is not seated in the "meaty" part of the palm, the wrist acts as a fulcrum for the entire load, leading to immediate strain.
- Lack of Forearm Verticality: When the forearms are not perfectly vertical, the load is distributed at an angle, forcing the wrist to stabilize the weight against gravity rather than simply supporting it.
- Inappropriate Grip Width: A grip that is too wide forces the elbows to flare outward, creating an unnatural angle for the wrists. Conversely, a grip that is too narrow can cause the bar to drift forward, dragging the wrists into an compromised position.
5 Form Fixes to Rebuild Your Overhead Press
Before you abandon the barbell entirely, it is worth attempting to "re-learn" the movement. Often, what feels like an injury is merely a technical error that has been reinforced by heavy, ego-driven training.
1. Master the Palm Placement
The bar should never sit in your fingers. By placing the barbell deep into the heel of your palm, you align the weight directly over the radius and ulna bones of your forearm. This structural stack allows the bones to support the load, rather than the ligaments and tendons of the wrist.
2. The "Knuckles to the Ceiling" Cue
A common culprit for wrist pain is the "dangling" hand. By actively pointing your middle knuckles toward the ceiling, you force the wrist into a neutral or slightly flexed position. This creates a rigid platform for the barbell and prevents it from rolling backward.
3. Vertical Forearm Calibration
From a front-facing perspective, your forearms should look like two pillars supporting a roof. If your forearms are angled inward or outward, you are losing force and stressing your joints. Use a mirror or film yourself to ensure that your elbows are tucked slightly inward, creating a straight line from the barbell to your wrist, and from your wrist to your elbow.
4. Optimize Your Grip Width
"Just outside shoulder width" is a starting point, not a universal rule. If you have long limbs, you may need a slightly wider grip to keep your elbows tucked; if you have shorter limbs, a narrower grip may be more stable. Experiment by moving your hands half an inch in or out until you find the "sweet spot" where the bar feels balanced and your wrists feel neutral.
5. Periodize the Load
If your form breaks down at 135 pounds, you have no business pressing 155. Drop the weight to a point where your technique is flawless. Focus on the "grind"—the slow, controlled ascent—to ensure that your form remains locked in. Only once you can perform 10 perfect repetitions should you consider adding weight.
The Search for Alternatives: Why "Different" Doesn’t Mean "Easier"
If you have tried the form fixes and the discomfort persists, it is time to pivot. A viable alternative to the barbell overhead press must satisfy three criteria:
- Shoulder Dominance: The movement must continue to prioritize the anterior and medial deltoids.
- Freedom of Movement: It should allow for a more natural wrist position, such as a neutral (palms facing) or semi-neutral grip.
- Similar Pressing Path: It must mimic the vertical or near-vertical pressing motion to ensure carryover to your overall strength goals.
5 Wrist-Friendly Alternatives to the Barbell Overhead Press
If the barbell refuses to "play nice" with your anatomy, these five exercises will allow you to continue building massive, functional shoulders while giving your wrists the relief they require.
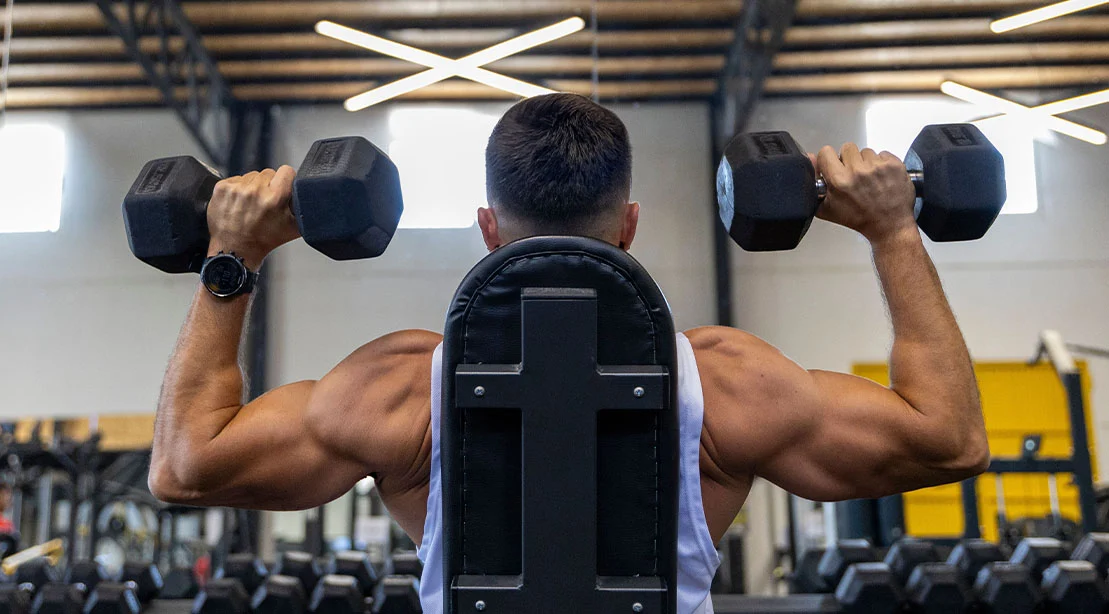
1. Neutral-Grip Dumbbell Overhead Press
The dumbbell press is the gold standard for those with wrist issues. By holding dumbbells with palms facing each other, you eliminate the rigid constraints of the barbell. This allows your shoulders to move through their natural range of motion.
- Why it works: It allows for independent movement of each arm, preventing one side from compensating for the other.
- Pro Tip: Keep your elbows slightly in front of your body (at a 45-degree angle) rather than directly out to the sides to protect the shoulder capsule.
2. Half-Kneeling Landmine Press
The landmine press is a hybrid between a horizontal and vertical press. By anchoring one end of the barbell, you gain a massive amount of stability while allowing your hand to remain in a comfortable, angled grip.
- Why it works: The arc of the press is more forgiving on the joints, and the half-kneeling position forces you to engage your core and glutes, adding a functional stability element.
3. Bottoms-Up Kettlebell Press
This is the ultimate "truth teller" for wrist stability. By holding a kettlebell upside down (the bell is in the air), you force your grip to tighten and your wrist to stay perfectly stacked. If you allow your wrist to extend, the bell will immediately tip over.
- Why it works: It forces you to use lighter weights, which provides a high-intensity shoulder stimulus without the heavy, crushing loads that aggravate chronic wrist issues.
4. High-Incline Dumbbell Chest Press
By setting a bench to a 60–75 degree angle, you create a pressing movement that is primarily shoulder-dominant. Because you are supported by the bench, you can focus entirely on the shoulder contraction without worrying about balancing the weight.
- Why it works: It removes the need for core stabilization, allowing you to safely push to technical failure.
5. Neutral-Grip Machine Shoulder Press
There is no shame in utilizing machines. Modern shoulder press machines are designed to follow a natural movement arc.
- Why it works: The fixed path and neutral handles allow you to safely overload the muscles, reaching total muscular fatigue—a key component of hypertrophy—without the risk of the bar slipping or the wrist collapsing.
Implications: The Path Forward
The objective of any training program is longevity. If you cannot press because of pain, you are not just missing a workout; you are losing the ability to build the foundation of your upper-body strength.
The transition to wrist-friendly alternatives is not a sign of weakness; it is a tactical adjustment. By incorporating neutral-grip movements and focusing on proper joint alignment, you can maintain your training volume while allowing your wrists the time they need to recover.
Remember, there is no "mandatory" exercise in the gym. The barbell is a tool—a highly effective one, but a tool nonetheless. If the tool is causing damage, it is time to reach for another. Your shoulders will continue to grow, your strength will continue to climb, and, most importantly, your wrists will finally have the freedom to function as they were designed. Train smart, listen to your joints, and never prioritize a specific piece of equipment over your long-term health.