


Published: June 29, 2026
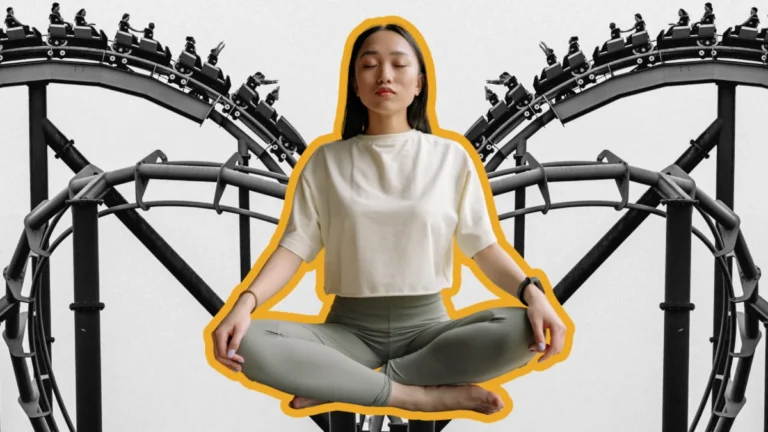
In an era defined by high-intensity interval training, rapid-fire digital notifications, and the perpetual motion of modern life, the practice of Yin Yoga has emerged as a necessary counterbalance. Unlike the muscular, heat-building "Yang" styles of yoga that dominate fitness culture, Yin Yoga invites practitioners to slow down, settle into the connective tissues, and embrace the transformative power of stillness.
For those new to the practice, the entry barrier is remarkably low. Contrary to popular belief, Yin Yoga does not require an advanced level of flexibility, nor does it necessitate expensive equipment. As demonstrated in a widely popular instructional series by Yoga with Kassandra, a simple mat and a commitment to stillness are all that is required to begin this restorative journey.
The Three Pillars of the Yin Philosophy
To understand the efficacy of Yin Yoga, one must first grasp its foundational principles. Unlike dynamic flow yoga, which focuses on muscular engagement, Yin Yoga is defined by three primary tenets:
- Finding Your Edge: Practitioners are encouraged to find the point of sensation—that moment where the body feels a stretch—without crossing into pain. It is an exercise in listening to the body’s limits rather than forcing them.
- Maintaining Stillness: Once a shape is established, the goal is to remain as still as possible. By reducing movement, the body can shift from a sympathetic nervous system state (fight or flight) to a parasympathetic state (rest and digest).
- Holding for Time: Yin poses are held for extended periods, typically three to five minutes. This duration allows the stretch to move beyond the muscles and into the deeper fascia, ligaments, and joints.
By adhering to these principles, practitioners report a significant reduction in tension and an increase in joint mobility. It is a practice of "doing nothing" in order to "achieve everything."
The Science of the Stretch: Why Duration Matters
The physiological implications of Yin Yoga are profound. When we hold a pose for several minutes, we target the connective tissues—the dense, fibrous network that wraps around our muscles and organs. Because these tissues are less elastic than muscle fibers, they require a slow, sustained, and passive load to release tension.
Research suggests that this slow, long-held stretching can help improve the hydration of fascia and increase the range of motion in joints that have become stiff from prolonged sedentary behavior, such as desk work or repetitive athletic motion. Furthermore, the meditative aspect of the practice provides a mental "reset," lowering cortisol levels and fostering a sense of psychological equilibrium.
A Step-by-Step Sequence for the Home Practitioner
Following the overwhelming response to her guided sessions, the following sequence has been curated to help beginners establish a consistent home practice. While no props are strictly necessary, a blanket for knee support is a recommended comfort for many.
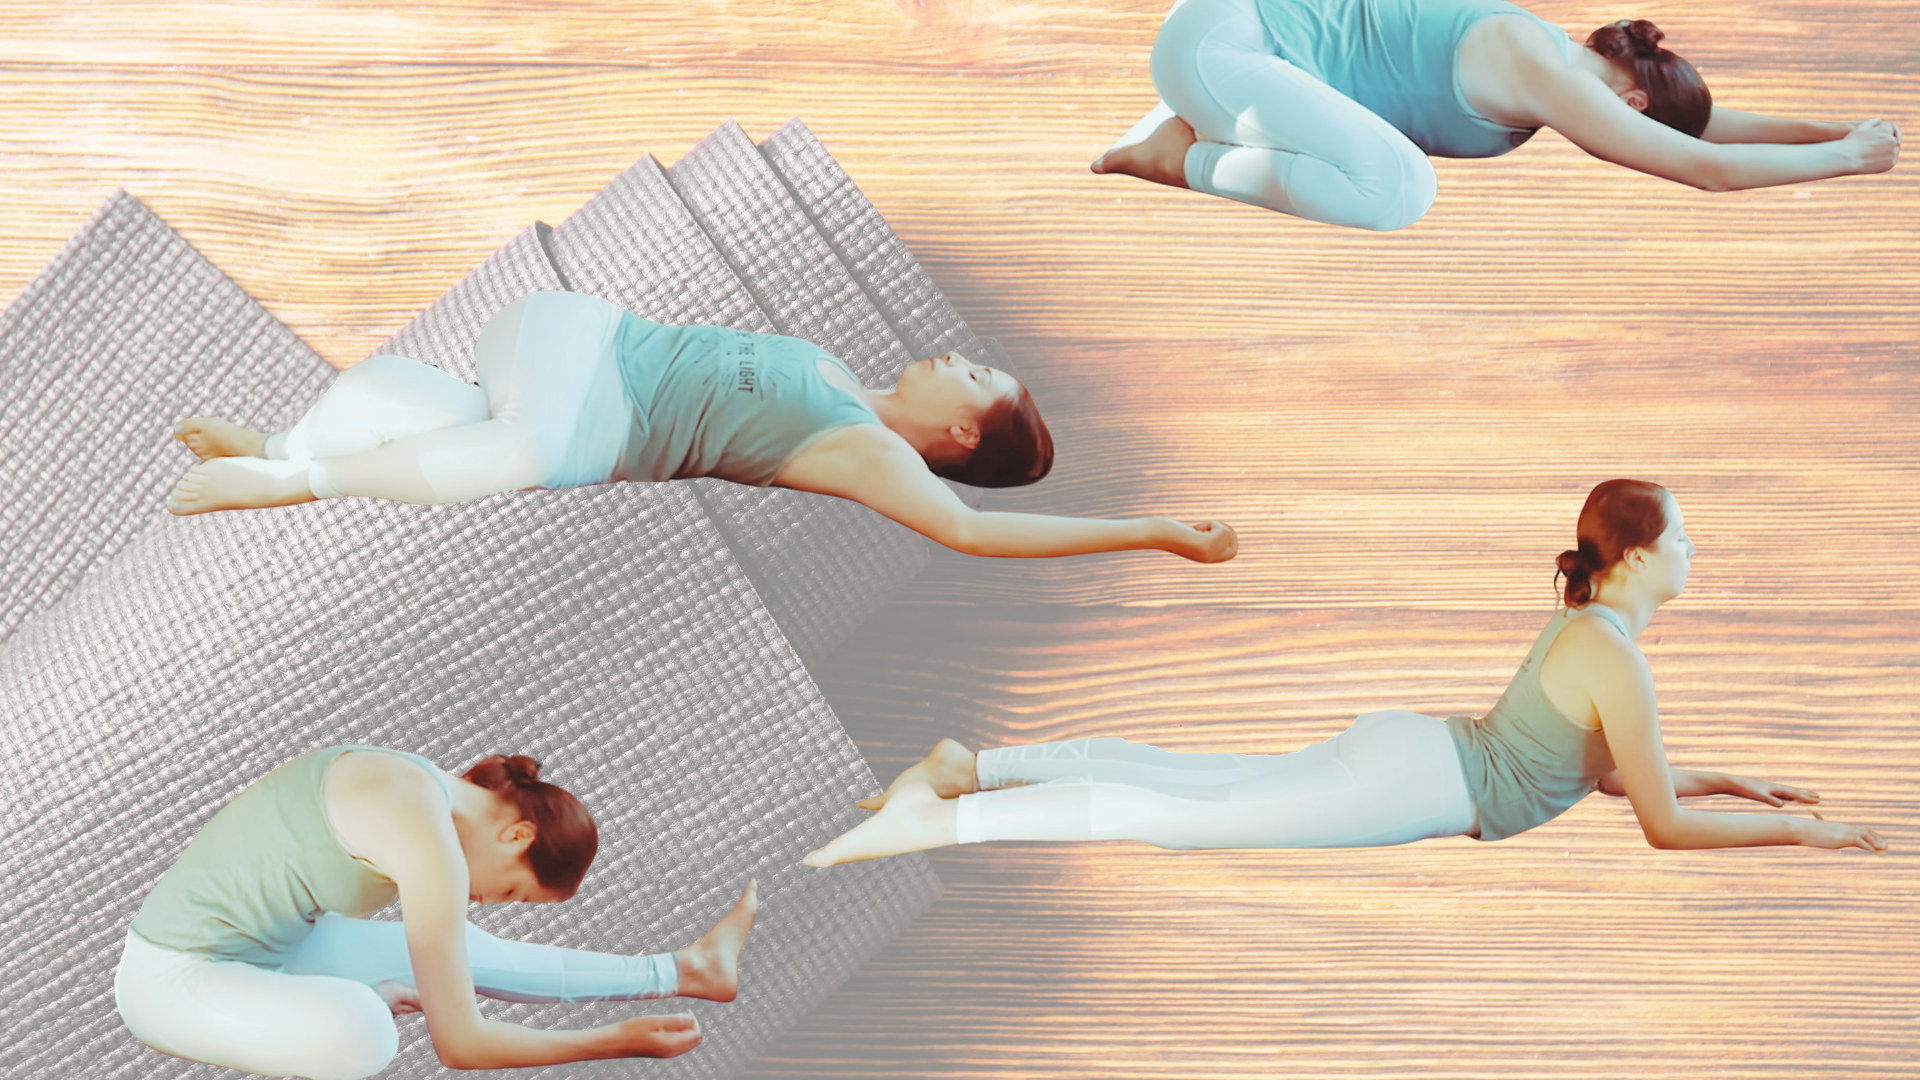
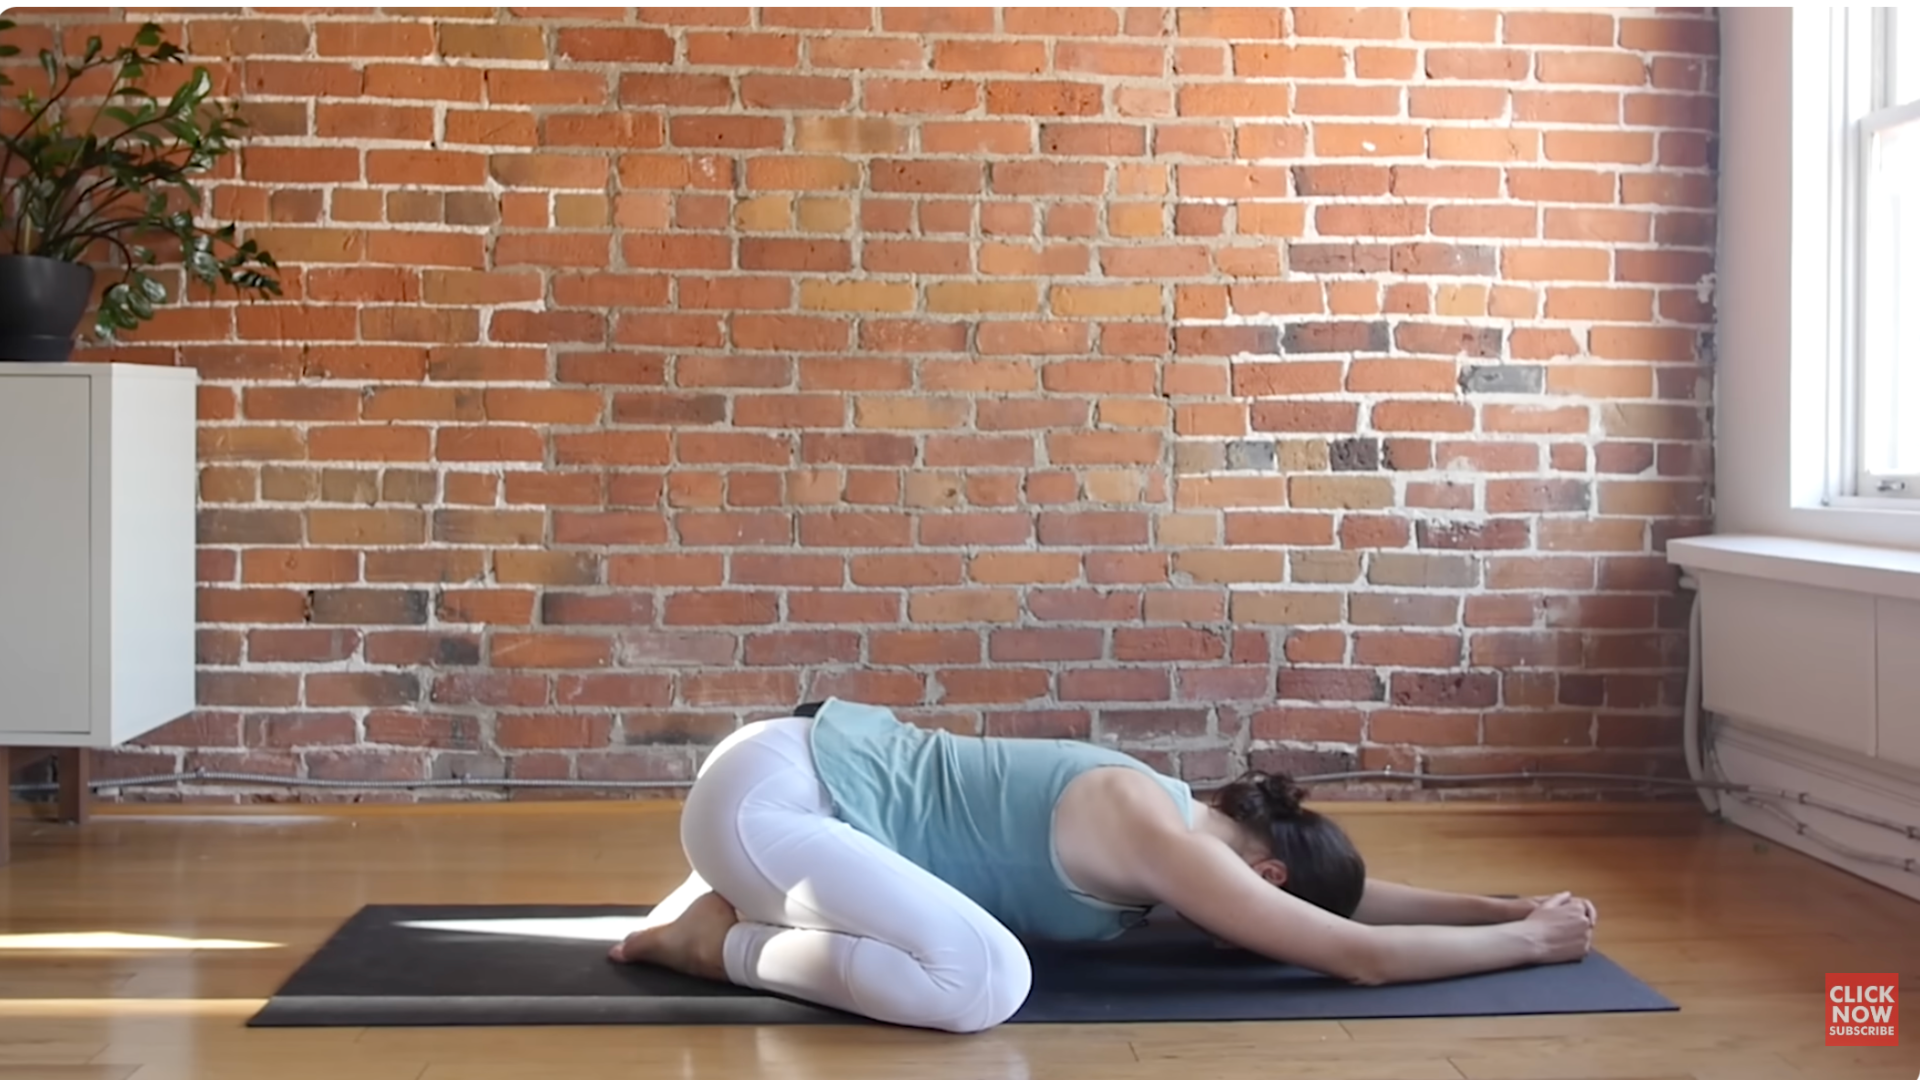
1. Child’s Pose (Balasana)
Begin by kneeling on the mat, bringing the big toes together. Depending on your comfort level, widen the knees to increase the depth of the hip stretch. Extend your arms forward, lowering your forehead toward the mat. If your head does not touch the surface, utilize a block or stacked hands for support. This pose sets the tone for the practice, grounding the practitioner and preparing the nervous system for deeper work.
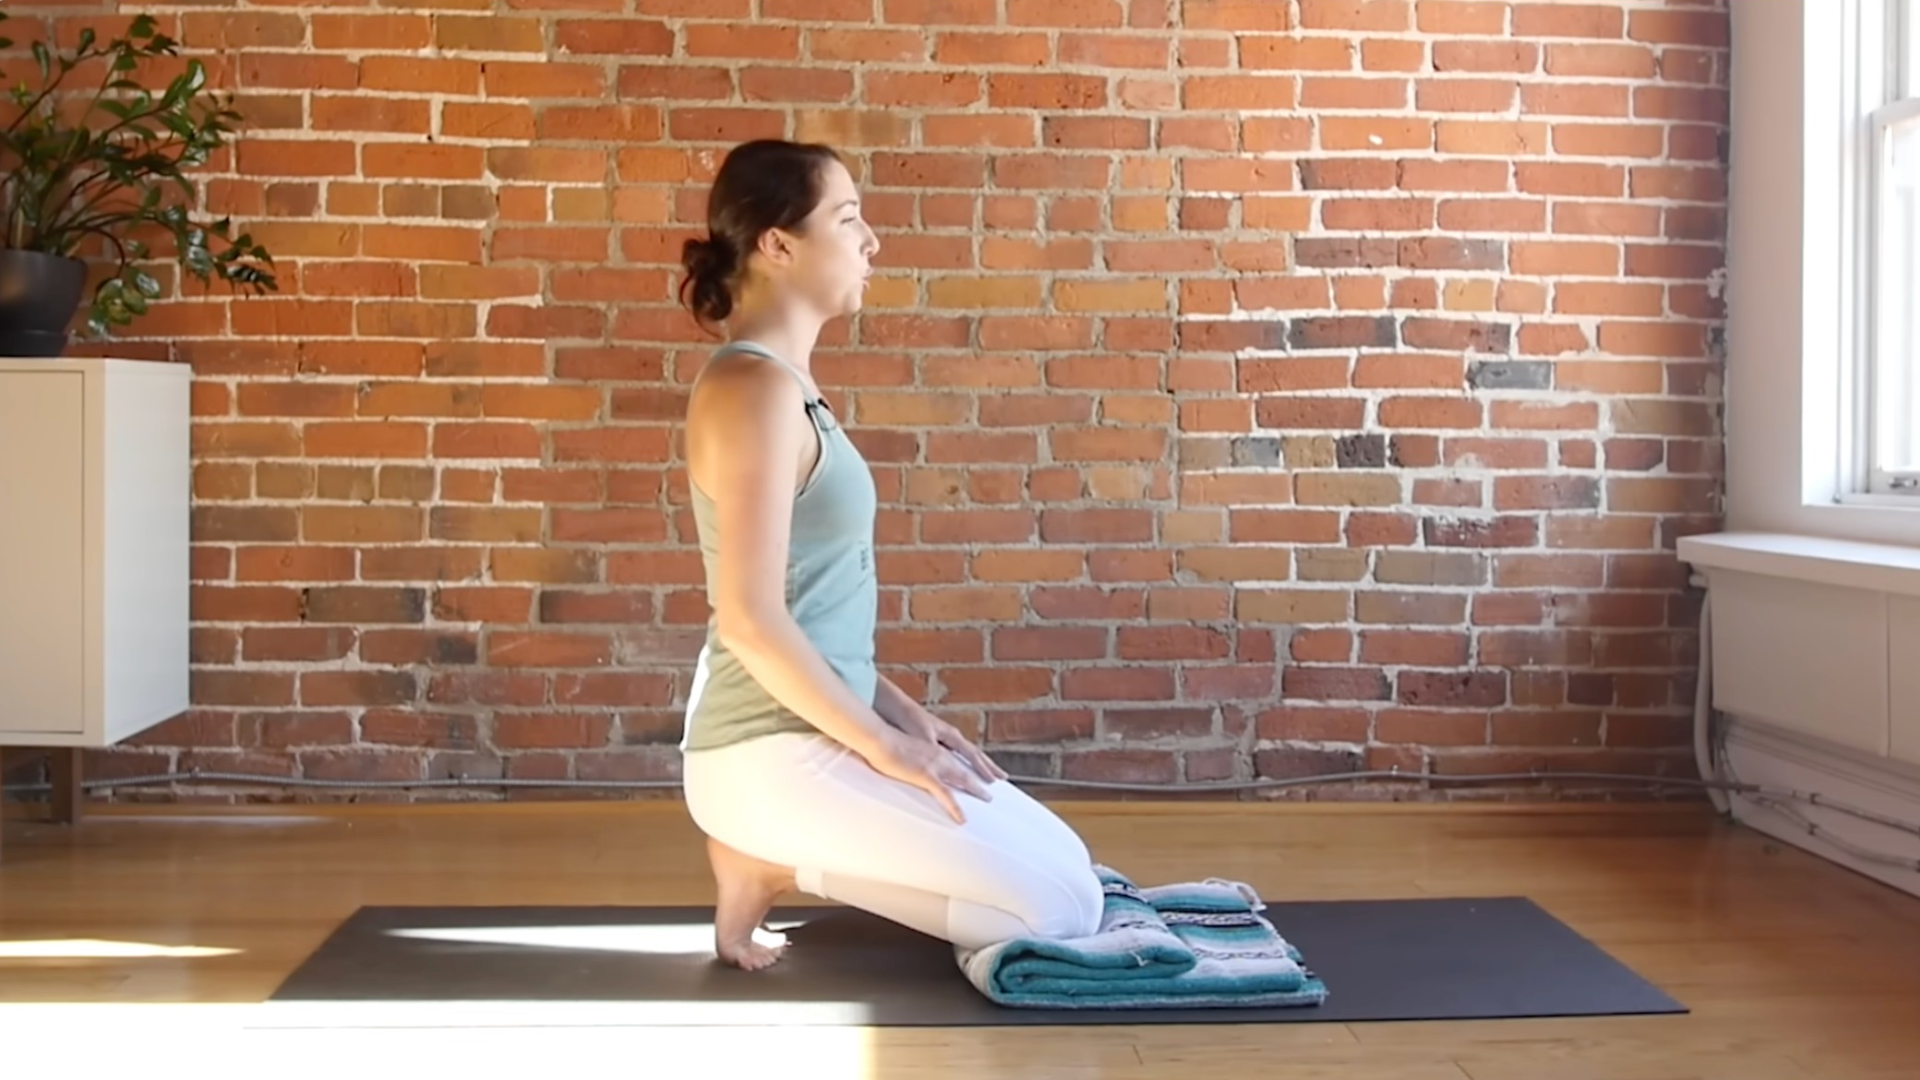
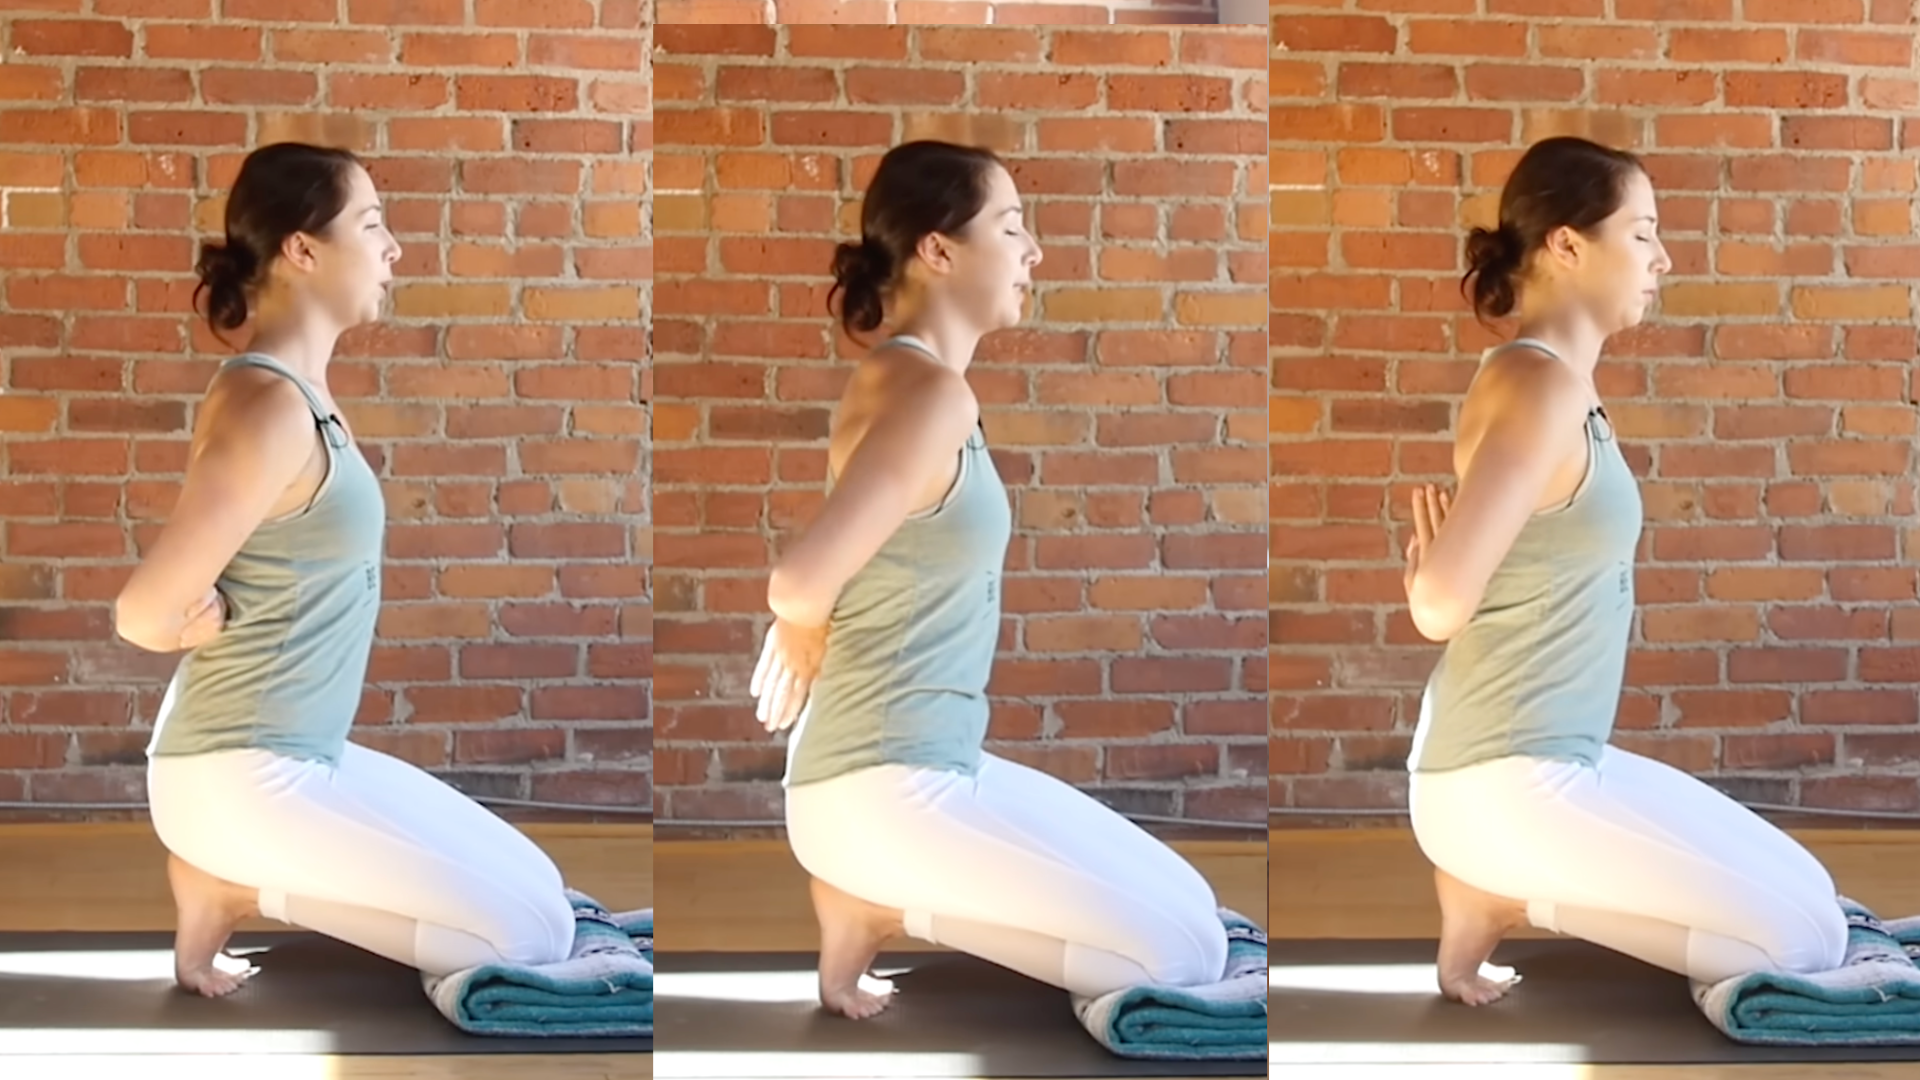
2. Toe Squat
Often considered one of the most intense poses for beginners, the Toe Squat targets the plantar fascia—the tissue on the bottom of the feet. This is particularly beneficial for those who wear constrictive footwear or high heels. By curling the toes under and sitting back on the heels, you create a direct release for the feet. To mitigate the intensity, lean forward, placing hands on the mat to distribute weight. For those seeking an upper-body challenge, the "reverse prayer" arm variation can be incorporated to open the chest and shoulders.
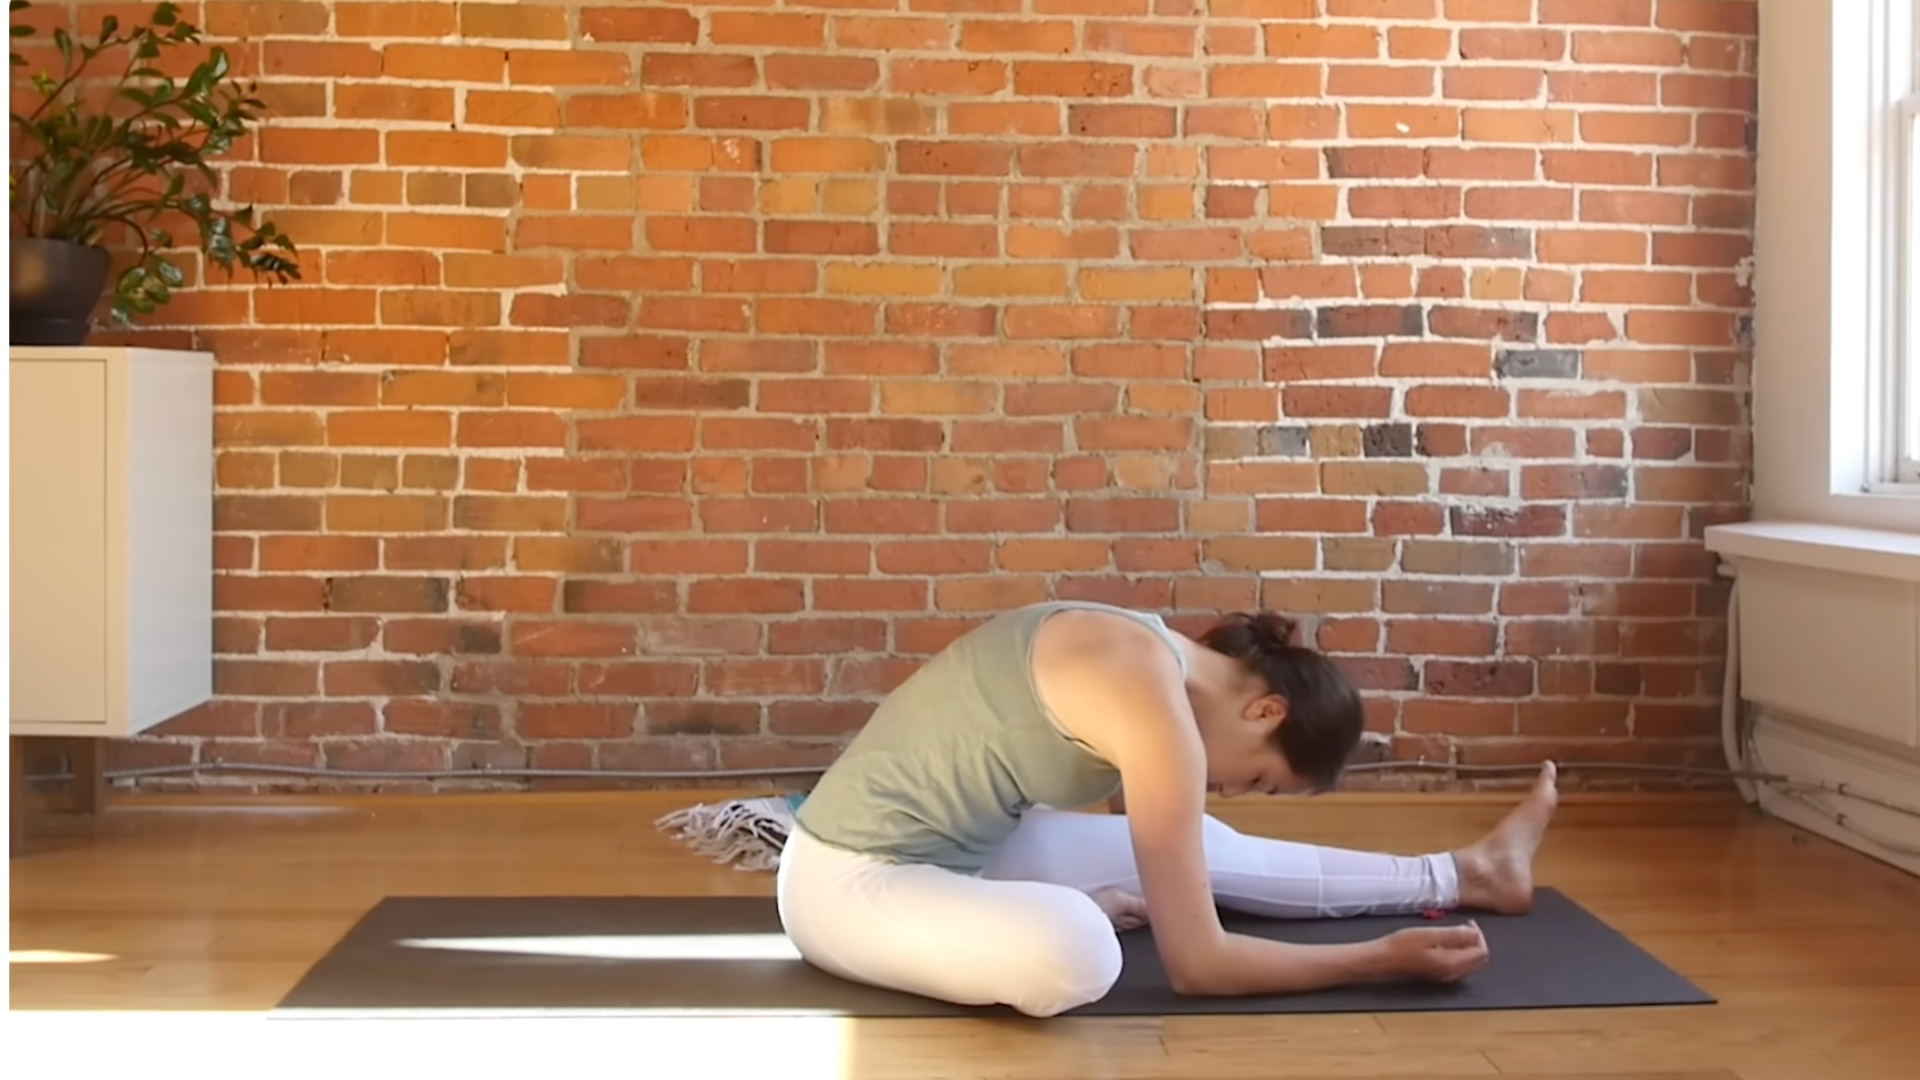
3. Half Butterfly Pose
This pose mimics the traditional "Head-to-Knee" pose but prioritizes passive release. Extend one leg forward while keeping the other bent, with the foot resting against the inner thigh of the extended leg. Instead of reaching for the toes with effort, allow the spine to round and the head to hang heavy. Gravity acts as the instructor here. By remaining passive, you allow the hips and hamstrings to open naturally over the three-minute hold.
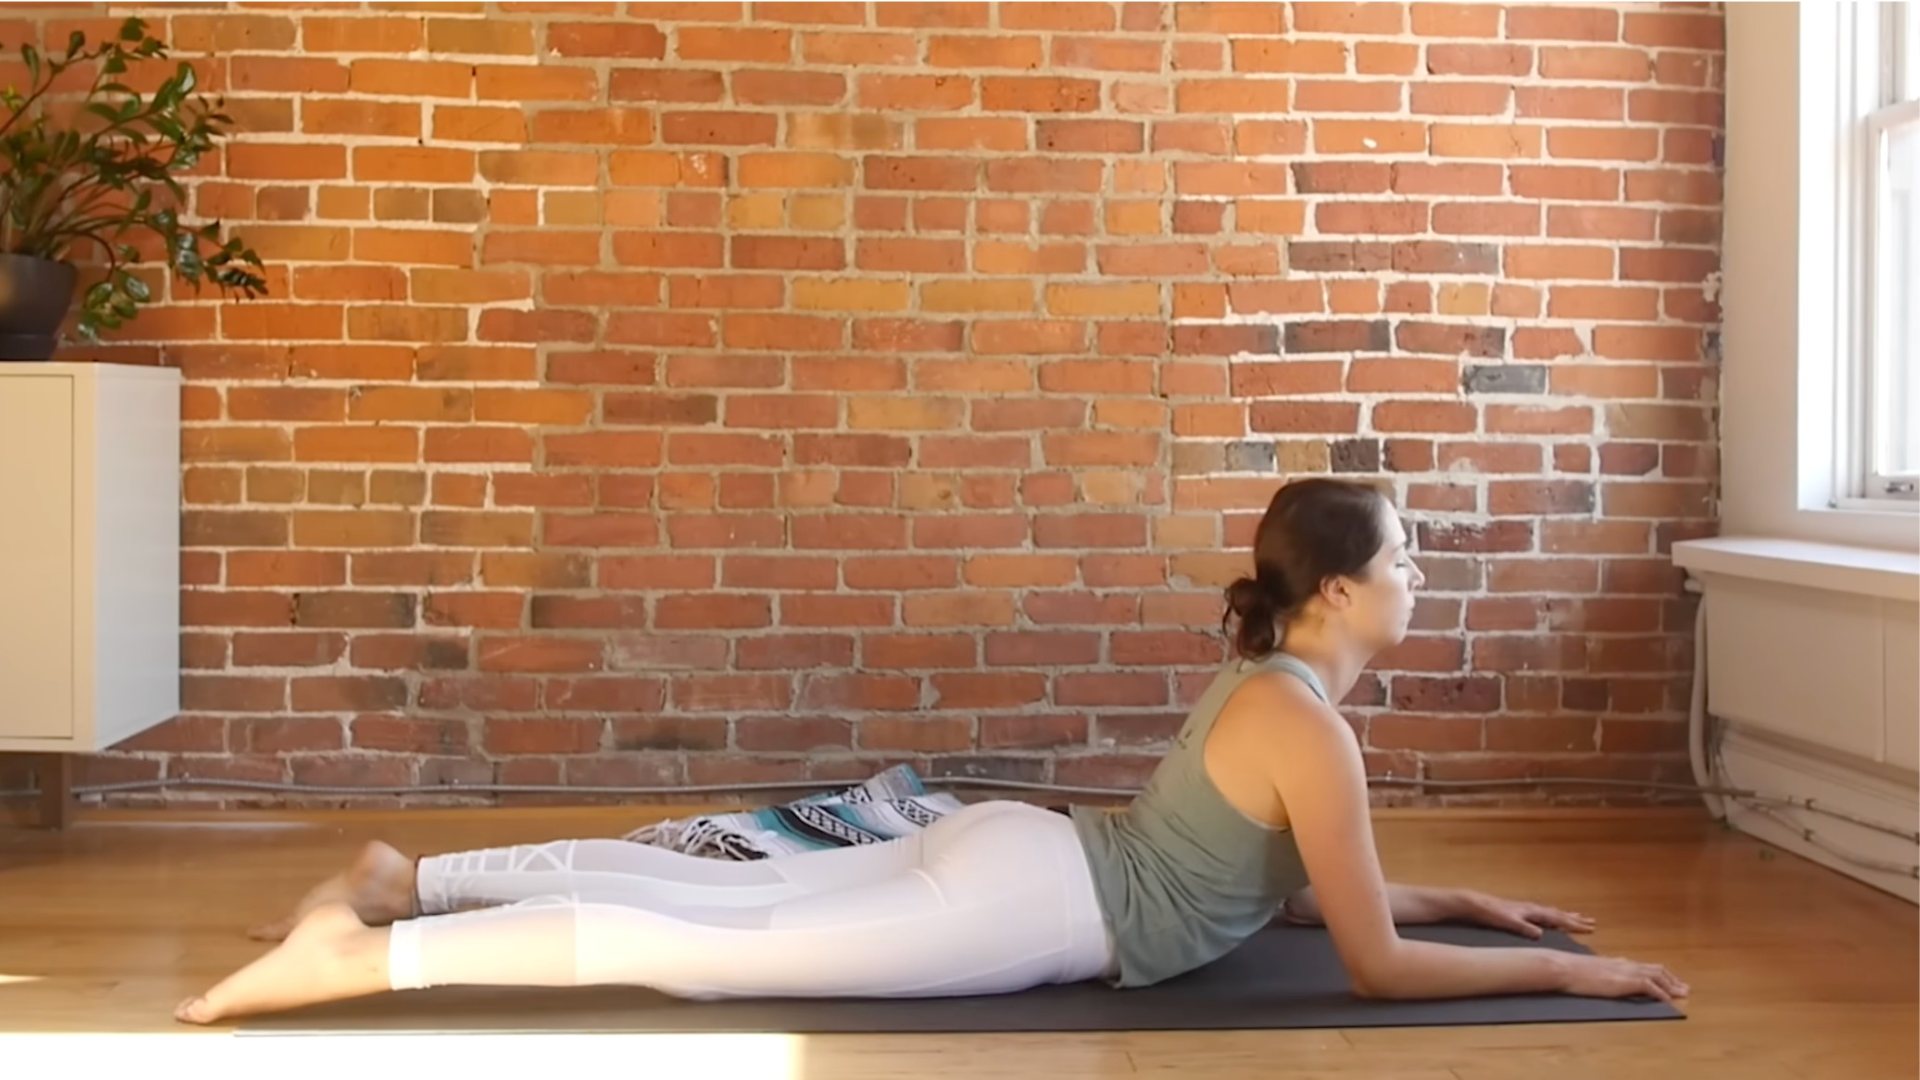
4. Sphinx Pose
To counteract the forward-folding nature of modern life, the Sphinx pose provides a gentle, supported backbend. Lying on the belly, prop yourself up on your forearms, keeping the palms flat. The focus here is on lengthening the spine and creating space in the neck. By reaching the tailbone toward the heels, you protect the lower back while effectively stretching the front body and abdominal wall.
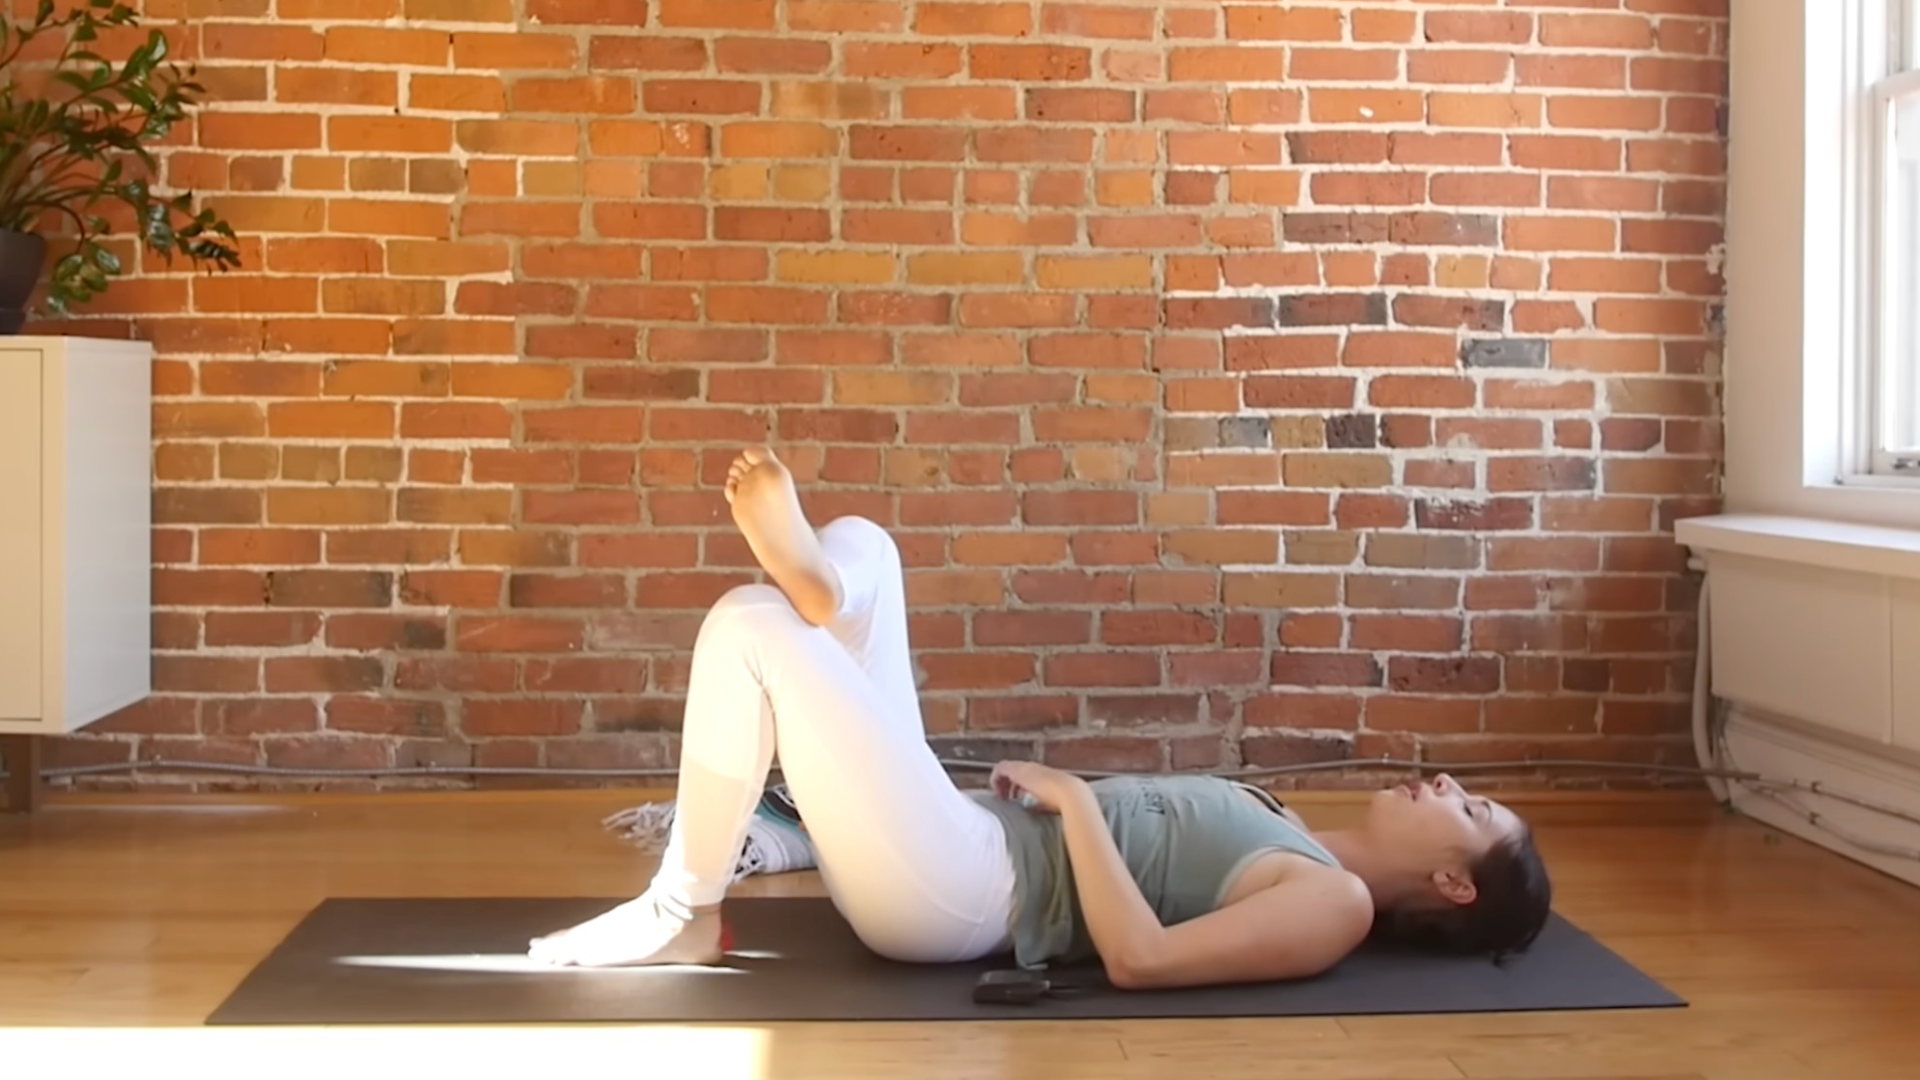
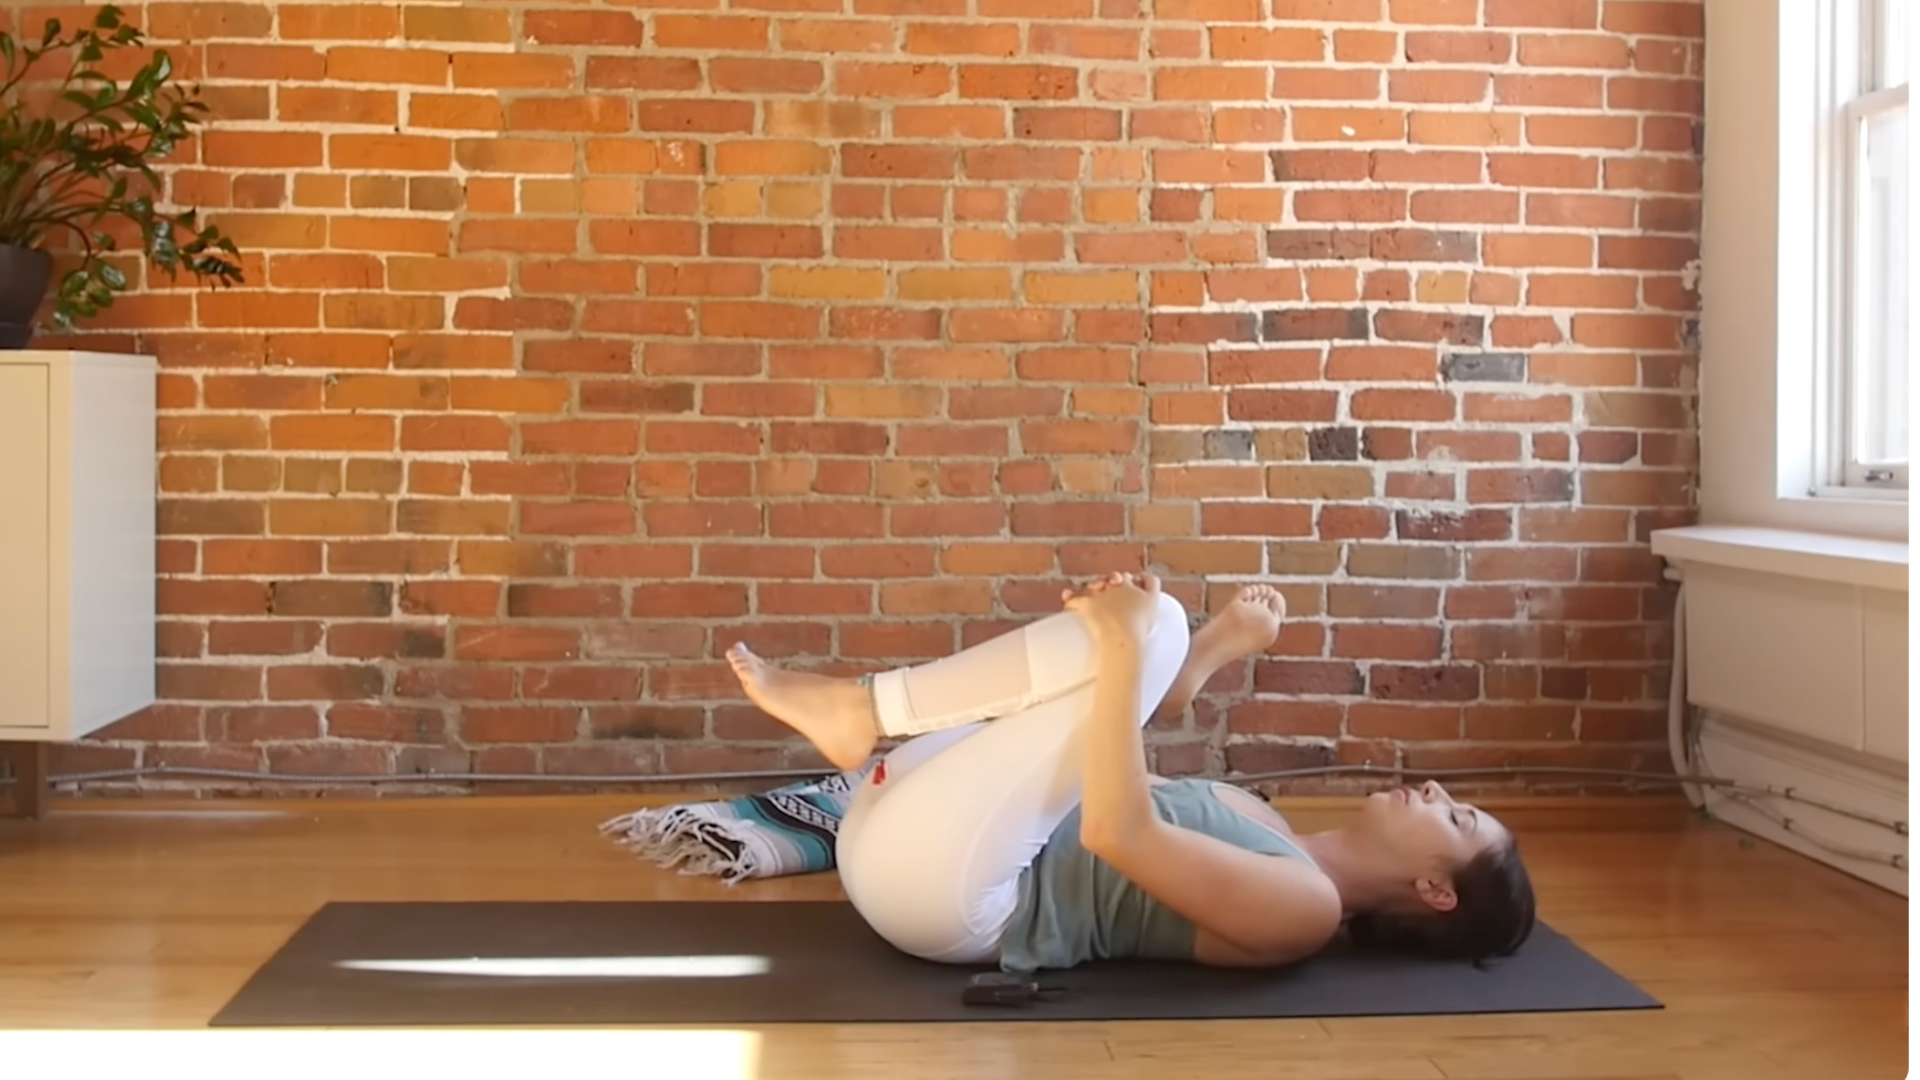
5. Reclined Pigeon Pose
This pose offers a safer, more accessible alternative to the traditional Pigeon pose. Lying on your back, cross one ankle over the opposite knee. By drawing the legs toward the chest, you can effectively target the outer hip and gluteal muscles. Because you are lying on the floor, the spine is supported, allowing for a deep release in the hip capsule without the risk of knee strain often associated with upright variations.
6. Reclined Twist
Spinal health is a cornerstone of longevity. The Reclined Twist is an essential "finisher" to the practice. By shifting the hips slightly to one side and allowing the knees to fall to the opposite side, the spine undergoes a gentle rotation. This helps to hydrate the spinal discs and provides a final release for the mid-to-lower back muscles.
The Integration: Savasana
While technically a transition pose rather than a Yin posture, Savasana (Corpse Pose) is non-negotiable. After stimulating the connective tissues and moving the joints through various ranges of motion, the body requires time to integrate these changes. Lying flat with palms facing upward allows the nervous system to process the session. It is here that the true work of the practice—the settling of the mind and the dissolution of remaining tension—is realized.
Implications for Modern Wellness
The rise of Yin Yoga signifies a broader cultural shift. As professional athletes, corporate executives, and students alike face burnout, the demand for "low-impact" wellness solutions has skyrocketed. The implications of this are significant:
- Injury Prevention: By focusing on joint health and fascia, Yin Yoga acts as a prophylactic against the repetitive strain injuries common in high-impact sports.
- Mental Health: The meditative requirement of holding a pose for three minutes cultivates "mindfulness by force." It trains the brain to remain calm in the face of physical discomfort, a skill that translates directly to stressful real-world situations.
- Accessibility: By removing the need for props, expensive memberships, or extreme athleticism, Yin Yoga democratizes wellness, making it accessible to individuals regardless of their socioeconomic status or physical starting point.
Conclusion: Starting Your Journey
The beauty of Yin Yoga lies in its simplicity. You do not need to "achieve" a perfect pose; you simply need to show up and be present. As the practice continues to grow in popularity, it serves as a gentle reminder that progress is not always measured by speed or intensity. Sometimes, the most significant growth happens when we simply stop, breathe, and allow ourselves to be still.
Whether you are a seasoned yogi looking to balance your practice or a complete beginner seeking relief from the rigors of daily life, the six poses outlined above offer a perfect entry point. Remember: the mat is not a place to perform, but a space to explore. Find your edge, maintain your stillness, and let the practice unfold at its own pace.